Description
Moving Holes?
Custom Plates?
Pickup Options?
Colours Explained?
Warranty & Returns
FAQ
Specifications
One Humbucker, No Fuss… or a Blank Canvas?
This might not be the most inspiring sales pitch you'll ever read—but if you're here, there's a good chance it's exactly what you're after.
At first glance, this is an incredibly simple pickguard . It’s most recognisable as the layout used on the Tom Delonge Stratocaster® —a great guitar, iconic in its stripped-back approach. Just a bridge humbucker , and a single volume control tucked down near where the switch would usually sit. No tone knobs, no selector switches. Just plug in and go.
And if that’s what you want? You’re in the right place.
But this plate can be more than a signature replica—it’s a blank canvas .
Why We Made These Plates
This isn’t one product—it’s 4 variations , all based on the same platform:
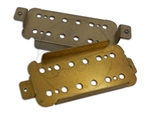
Covered humbucker or uncovered humbucker
With switch route or without (or, we take the "without " and drill in the 1/2" hole for the toggle )
None of them come with pot holes—we drill those to order , so you can place your controls exactly where you want them.
The reason we keep these in stock is simple: they’re a launchpad for your own custom design .
A Head Start for DIY Builders
There are four things that make building your own pickguard from scratch genuinely tricky:
Routing the outside shape
Routing the switch slot
Drilling and countersinking the mounting holes
Neatly routing humbuckers (especially with their tight corner radii)
These plates solve all of those problems.
So if you want to build, say, a HB/SC/P90 layout—grab one of these, route in your extra pickups (P90s and single coils are far easier to cut cleanly), and you’re halfway there. It’s not easy , but it’s a lot easier than starting from scratch.
So, What’s This For?
If you want to build a lean, fun, no-nonsense Strat® with a humbucker and a single control—this is perfect.
If you want to go wild with custom pickup combinations and have a rock-solid base to start with—this is still perfect.
Whatever route you go down, it’s a simple piece of plastic that opens up a lot of creative potential.
A Closer Look and what to look out for
Mounting Holes
Most of us are familiar with the classic Strat® pickguard featuring 11 mounting holes — it’s the final form in the plate’s evolution. Everything is positioned to minimize warping, and this layout appears everywhere. Not just on Fender® guitars, but on nearly any guitar with a “Strat-like” style — chances are, it’s using a modern-spec plate just like this.
Pickup and Switch Bolts
Fender® used countersunk screws for pickup and switch mounting right up until U.S. production paused in late 1984. When manufacturing resumed in 1987 at the new Corona plant, dome-head screws began appearing on pickups and switches. It wasn’t a clean break — countersunk screws lingered into the late ’80s, and Japanese reissues continued the overlap — but generally speaking, from 1987 onward, most American Stratocasters® featured dome-head screws for pickup height adjustment and switch mounting.
Truss Rod Access
With the introduction of the “bullet” truss rod nut in 1971, Fender® Stratocasters® began to feature truss rod adjustment at the headstock rather than the heel. To accommodate this change, the pickguard was updated — the familiar “half moon” notch in the neck pocket (previously there to allow heel-end adjustment) was removed.
That revised pickguard design remained in place even through later changes, including the 1983–84 shift from countersunk to dome-head screws for pickups and switch mounting.
Edges
Although this plate design first appeared in the 1980s, it’s still in use today. While three-ply (and even four-ply) guards are by far the most common, single-ply versions do occasionally show up — so we stock both.
That said, since we’re well beyond the realm of strict historical accuracy with this style, we only carry the thicker single-ply plates — 2.3 mm, just like our 3- and 4-ply options — as they’re far more resistant to warping.
Fender®, Squier®, Stratocaster® and Strat® are registered trademarks of Fender Musical Instruments Corporation and Axesrus® has no affiliation with FMIC
A few years back, we changed how we approached pickguards. For a while, we ran a full “custom pickguard” service — and to be honest, it was a headache from start to finish. Interestingly, the most common requests weren’t for wild custom shapes — just standard plates with slightly different control layouts.
So, when the full custom work wound down, we took a more practical approach: we started stocking “half-finished” pickguards — fully cut and finished, but without the control pot holes drilled. This allows us to offer a wide range of pickup and control options, drilling the holes in-house to your spec. It’s quick, simple, and keeps costs down — no need for a full custom build.
What’s Custom, and What Isn’t?
Let’s be clear — this isn’t a full-blown custom shop service. We’re not cutting new shapes, routing entirely new cavities, or making major structural changes.
Instead, we’re simply drilling different control layouts using jigs and a pillar drill. While that technically makes these pickguards “custom” (since they’re made to order), the scope is intentionally limited.
You’re choosing a pre-made plate — often something like a covered or uncovered HH layout — and we’re customising the pot holes, and occasionally routing a pickup if needed.
Any Extra Costs?
You Can Have Three Hole Sizes Drilled
We offer three sizes of holes, depending on your needs:
10 mm – for standard pots
½" – for full-size toggle switches
¼" – for mini toggle switches
The positions stay the same; only the diameters change depending on what you’re adding.
So — with all that in mind — let’s walk through how to understand where the holes go and how to get the layout you want.
This is, probably, easier with a diagram, but, be warned, whilst it makes sense - its pretty cluttered.
Diagram Key
10 mm Pot Holes: White
¼" Mini Switch Holes: Pink
½" Toggle Switch Holes: Grey
UFO Knobs (~1" diameter) and Switch Tips (9 mm over the slot): Green
The system is smart enough to prevent most overlap issues, but some combinations sneak through. For example, fitting a 10 mm pot in the Offset 2 position alongside any switch will get really tight once the knob is installed.
And in closing - Pickguards, once drilled away from the standard hole plan, come under the remit of Custom work and as always, if you've got any questions what so ever, please feel free to get in touch with us and we can talk through all the finer details of your proposed build.
You’ll have to forgive the slightly grumpy tone here—but, truth be told? Custom pickguards aren’t exactly “fun.” From the stock side, the manufacturing side, or even routing them myself, it’s a headache. Years of “I don’t want to pay that” emails haven’t helped either.
So this section isn’t about showing off a dazzling product range. It’s more like: here’s what we can actually do—it might not be glamorous, but it’ll get you out of a jam.
First things first: we’re not actually making “custom” pickguards from scratch.
What we are doing is modding existing plates—re-routing, tweaking, adding extra holes. Basically, taking a pre-cut guard that already mostly matches what you need, and nudging it closer to your spec.
What we can’t do:
What we can do:
A Couple of Examples:
Covered HSS plate? That’s standard. No extra charge—grab it, pack it, ship it.
Covered HH plate, but with an extra uncovered humbucker in the middle? Now we’re talking. We take the stock plate, slot it into the jig, and drill the extra pickup ourselves. Not a huge job, but it’s dusty, it takes time, and there’s a bit of wear on tools—so yes, there’s a small extra charge.
So, what’s the deal?
Standard plate: If you spec something we already make (highly likely if it’s a common layout), there’s no upcharge—grab it, ship it, job done.
Modded stock plate: If it’s basically a stock plate but with an extra pickup (or two) routed in, there will be a small upcharge. Simple, quick, and not too painful, but still extra work.
Blank or heavily customised plate: If your spec means starting with a “blank” plate and routing multiple pickups, the job can be done—but the charges start to creep up. The more pickups, the more complicated, the more expensive.
Outside our scope: Anything that involves changing the outer shape, moving mounting holes, messing with bevels, or similar? Sorry, we can’t do it.
Pot holes, colours, and quirks:
The Bottom Line:
Pickups
Choose from a range of pickup styles to suit your build.
Humbuckers
The HB Strat® pickguards are so common these days that most players don’t even think of them as a “mod” anymore. Still, it’s worth approaching humbucker routes with the mindset that this isn’t the standard setup —mainly because there are a few variations that can catch you out.
By default, we offer the bridge position routed for either an Uncovered or Covered humbucker , included at no extra cost.
Prefer a 3-screw mount humbucker ? We can do that too. This option requires routing the pickguard to order, which involves extra work and carries a small additional charge.
Uncovered Humbucker This is what I’d call the “standard” humbucker option for a Stratocaster®. Technically, it’s not truly standard—Fender® usually use a 3-screw mount humbucker—but most aftermarket pickups aren’t built that way, so this layout has become the norm.
The pickup route has rounded corners that follow the shape of the bobbins, giving a clean and intentional look.
It’s cut slightly oversized to protect the coils and ensure compatibility with:
Standard uncovered humbuckers
49.2mm, 50mm, and 52mm spaced pickups
Trembucker® models (which are slightly larger again)
Covered Humbucker
Covered humbuckers aren’t actually that common on the Stratocaster®. Maybe it’s the odd mix of a metal-covered pickup next to plastic single coils—but for whatever reason, most aftermarket plates default to a covered bridge route.
The covered route is cut tight to the pickup cover , leaving no gaps or wiggle room. Since covered humbuckers are slightly larger than uncovered ones, the sizing of this route is specific to them.
This is a humbucker-only route—you won’t be able to fit a covered Trembucker® here (though those are rare anyway, since they don’t suit many guitars).
3-Screw Mount
I’ve always loved the Fender® 3-screw mount humbucker. It’s rock solid, looks great, and gives you far more control over the pickup angle than the usual 2-screw mount. In my opinion, it’s simply a better design.
The downside is that it’s almost exclusive to Fender® pickups—or anyone using our conversion plates.
The route itself is much like the uncovered humbucker cavity: slightly oversized, with rounded corners to match the bobbins. The key difference is the two screw holes on the bass side instead of one , which set it apart from the more common layout.
Since this has to be routed to order, there’s a small extra charge. But if you’re into Fender’s system, it’s absolutely worth it.
MisMatch
It’s actually pretty common—especially on non-Fender® guitars—to mismatch humbuckers and routes. You can usually get away with it, but there are a few rules of thumb worth knowing:
Uncovered humbuckers will fit into covered routes. They’ll work fine, though you’ll see a small gap around the pickup.
Fender® 3-screw mount humbuckers fit into both uncovered and covered routes, since they still retain the central mounting hole.
Covered humbuckers will not fit into uncovered or 3-screw mount routes—the route simply isn’t wide enough.
When in doubt, a covered route is the most universal option.
Covered vs. Uncovered Position
The position of a covered humbucker route isn’t the same as an uncovered one.
Why? Honestly, no idea. My best guess is that it goes back to the early days—before Fender® officially offered HB Bridge Strat® models—when the first templates were a little… creative .
Here’s what you need to know:
On genuine Fender® bodies, this usually isn’t an issue—the pickup cavities are routed generously. But on third-party bodies (where routing tends to be tighter), it’s definitely worth checking the available space before ordering.
Also, keep in mind: this only applies to the bridge humbucker . All other pickups—including neck humbuckers—sit in the same position, regardless of covered or uncovered.
Exceptions: Some Covered Plates Use 14mm Spacing
Because nothing’s ever simple—Fender® have recently started offering more models with covered humbuckers, and they seem to be moving toward standardising both covered and uncovered bridge routes at around 14–15mm from the trem cavity.
So, in a few cases, we’re playing catch-up.
To avoid headaches with the pickguard customiser, the safest rule is:
Assume all covered bridge humbuckers use the 10mm gap .
If your donor plate turns out to use the newer 14–15mm spacing, we’ll spot it during processing and reach out before cutting.
Nighthawk Humbucker
Gibson’s short-lived “super strat killer” from the ’90s, the Nighthawk , came with a pretty unusual pickup layout: a slanted bridge humbucker, a single-coil middle, and a Nighthawk mini-humbucker at the neck. And if you know the guitar, you’ll understand why those quotation marks are there—it was a bit of a dog’s dinner overall, and never really gained much popularity.
That said, the bridge pickup design had real potential that, in my opinion, was never fully explored. The slanted mounting gave the low strings more bass response, which made the guitar feel more aggressive and better balanced.
I’ve been experimenting with this setup on my Strat®, running an Axesrus® Heretic humbucker in the bridge. It’s… interesting. For me, it tips a little too far into the low end (though the Heretic is a pretty hefty pickup to begin with). Not for every situation, but definitely an option if you’re looking for something a bit different with more tonal variety.
If you’re curious about exploring something a little out of the ordinary, I’d definitely recommend giving the Heretic humbuckers a try —they’re surprisingly versatile and open up some tonal possibilities you won’t get from standard pickups.
A What?!
Okay, this is a bit of an indulgence, to be honest. I’ve always wanted a Gibson® Nighthawk —I have no idea why, and I can probably count on one hand the times I’ve actually been in the same room as one. But it’s one of those guitars that always seemed really well thought out to me, and the GAS (Guitar Acquisition Syndrome) just won’t go away.
They’re rare and expensive, and since I like a Strat®, this seemed like the next best option: routing a Nighthawk-style pickup into a pickguard to see what all the fuss is about.
The Route of All Evil
As with many of these “oddball” pickup routes, you’ll probably need to re-route your guitar to accommodate them. The Nighthawk pickup (currently only available for the bridge position) takes up more space under the hood than a standard humbucker.
It’s quite a refined design —not a homebrew or Billy-Joe Armstrong-style mod—so not only will you need to modify the guitar body (unless you’re lucky enough to have a “swimming pool” route), but you’ll also need a specific Nighthawk pickup with the slanted base and all.
Not Exactly "F-Spaced"
This is where I’m reminded why I was in the bottom set in maths—and why Pythagoras was more than just a clubbing hotspot in the 2000s!
Even with an F-spaced humbucker (assuming you’ve converted it to a “Nighthawk” using the correct base), the poles won’t perfectly align with the strings. It doesn’t really affect the pickup’s function, but, well… it does look a bit off.
Single Coils
“The Normal Stratocaster® Pickup”
It’s a bit of an oversimplification to call these just “single coils.” Strictly speaking, Telecaster®, Jazzmaster®, Jaguar®, and even P90 pickups are all single coils as well. But for whatever reason, when someone says “single coil,” most of us immediately picture a Strat® pickup.
Strat-style pickups are very much “Fender®” in how they’re built — and unmistakably Fender® in how they sound. I think most of us know what a Strat-style single coil does, so I’ll spare you a full-length deep dive.
That said, there are a few quirks unique to the Stratocaster® layout that are worth touching on, along with some interesting alternative options we offer.
Neck and Middle "Standard"
Why? Honestly, I’m not sure — and I doubt it’s a particularly exciting story. Maybe it was A/B tested and “flat” just sounded better. Or maybe it was never questioned in the first place; the Telecaster® didn’t do it, and neither did most other early electrics.
It’s mostly academic, because (and I write this sentence more often than I care to admit): we like what we know. If you like a Strat®, chances are you like the sound of a flat neck and middle single coil.
Slanting those pickups would change the sound — but they’re not slanted, so they don’t. The high and low strings are picked up from the same position, which means the low strings tend to come through a little more prominently in the mix.
“Double Single Coils"
Double Single Coils were, frankly, rare. Off the top of my head, I can only think of Robbie Robertson and his Last Waltz Stratocaster as a “known” example, and even then, it’s a bit of a left-field case, because the guitar wasn’t widely recognized until Fender released it as a (very short-lived) signature model. It’s a beautiful guitar, so I can see why it gained attention, and the main point of note was the “Double Single Coil” concept.
While Robbie, if not the inventor, was certainly an early adopter of the idea, Fender actually dabbled independently as well, with the 1990s Stratocaster Ultra , which sported a Lace “Dually”—essentially two single-coil-sized humbuckers wired in series. The routing was a “flat” Double Single Coil setup (whereas Robbie’s is a slanted version).
Either way, Fender revisited the concept more recently with the Squier Contemporary series, which featured a slightly different setup again (slanted this time, with the single coils very close, but separated). It’s a nice idea, and it has potential, but there are a few considerations.
Firstly, electrically, it’s not advisable to wire a “Double Single Coil” as though it’s a standard bridge and middle combination. The pickups are so close together that, assuming the middle coil is reverse-wound/reverse-polarity, using them both in parallel will induce significant phase cancellation, making the output almost unusable.
It’s better to follow Robbie’s approach and wire the two pickups in series, so they essentially act as a humbucker. The result is big, beefy, and aggressive—but a little unfamiliar. With an inductance around 6–7 Henries, it may feel slightly “loose and lardy.” It’s something different, certainly usable, but don’t expect Gibson-style tones just because it uses two coils.
PLEASE NOTE – I’ve included the “Double Single Coil Bridge Pickup” as an option in the HSS plates. Technically, this is what we’d call a “Juan” mod "deluxe". It’s a bit muddy, because at this point the plates are essentially custom-built, but here’s the gist: a pair of single coils wired in parallel are acting as a humbucker.
Since I’ve added all the other humbucker variations into the dropdown, I wanted to make sure nothing falls through the cracks. So: a Juan mod "Deluxe" is a HSS mod, but a HSS mod isn’t necessarily a Juan mod.
“Double” Slanted
I’ve maybe muddied the waters a little speaking about the Ultra Strat and Squier’s take on the idea, so for 100% clarity, our “double single coil” looks like this: two single coils, side by side, as part of the same route.
It retains the ethos of what Fender® initially intended with the bridge pickup (which is really useful if you’re considering coil-splitting the pickups!) and, frankly, the rule of cool triumphs here. It’s what Robbie Robertson did, so we’ve carried that idea over too.
Note: the mounting screws — the route assumes you’re fitting two single coils, so that’s two screws for each.
“Double” Flat
This setup is closer to the old Fender Ultra idea — two single coils acting as a humbucker, but mounted flat , like a traditional full-size humbucker, rather than on a slant.
Just to be clear: we’re assuming you’re not using an early Lace Dually here. Those had a metal “conversion plate” joining the two pickups together, so they mounted with a single screw at the bottom (near the volume pot), rather than four individual screws.
Later Dually models changed again. They’re built on a Fender humbucker-style base — what we call a 3-screw mount — and are designed to drop into uncovered humbucker routes . Technically, they’re still just two single coils wired in series, but when it comes to mounting, you're better off treating them like a standard uncovered humbucker these days.
Tonally? The “double flat” setup is a bit of an unknown. By removing the slant (on the bridge), you’re naturally going to brighten the treble strings and darken the bass side — that much we can safely assume — but if you’re using regular single coils rather than anything purpose-built, it’s hard to make any confident predictions beyond that.
Doing It “Wrong”
If you’re chasing this setup, you’ve probably worked out you “need” a bridge pickup and a middle pickup — one standard wind, one RWRP. The obvious issue is that the bridge pickup will foul the middle unless you spin the middle pickup around to make it physically fit.
That solves the clearance problem just fine… but it does mean the pole staggering ends up “the wrong way round.”
Honestly? I don’t think it matters. Once you’re wiring them in series, the tone is going to be so unfamiliar anyway that a bit of odd string balance is the least of your worries. But if you’re treating this as a labour of love, I get why it might still bug you.
Yes, it’s confusing. You're not going mad.
Under the Hood - Bridge
When I say “spin the middle,” this is what I mean: the bridge pickup sits as normal, but the middle pickup is rotated so it points up towards the neck. Nothing mysterious about it — though it’s worth noting that this setup does require a fairly substantial route.
If you want to go this way, there are absolutely no problems from a functional standpoint. It works just fine. You can even correct the pole staggering by using a left-handed stagger pickup in the middle position. In fact, this is — as far as anyone can tell — exactly what Robbie Robertson did back in the day.
Doing it Right
Personally, I like the pole staggering to be the “right” way around. It doesn’t necessarily save the idea for me — tonally, it’s just a bit too big for my tastes — but visually, it feels more intentional. It looks like a design that’s been thought through, rather than just “hey, let’s route out some more holes!”
Really though, this comes down to how much you want to invest in the idea. If you’re right-handed, chances are you don’t already have a left-handed pickup sitting in the parts box (and in this example, I’ve even used a side-loading pickup). That means you’re probably going to have to buy one.
And remember: you’re spending money to chase a sound that, realistically, you’ve probably only ever heard in the hands of one man. So if it’s worth anything — give it a go! You might love it. But my advice? Try it “wrong” first before throwing cash at it.
Refinement
And this is what it looks like under the hood if you’ve got access to every pickup under the sun — and the only band you ever listen to is The Band ! A regular single coil sits in the bridge slot, paired with a side-loading single coil in the middle.
This way, you can match the pole staggering without spinning pickups around, and you also save a little space in the routing. It’s neat, tidy, and looks properly intentional.
It’s also a very clean way to wire the pickups in series. Here’s the basic idea:
Connect the middle to the bridge
Splice the wires
Add a coil-split option
Instead of hardwiring the splice, route it through a mini switch or push-pull pot.
Flicking the switch breaks the series link, leaving just the bridge pickup active.
Simple, effective, and much more versatile — while still keeping that “double single coil” flavour intact.
Mini Humbuckers
Mini Humbuckers are, frankly, a little bit strange. As near as I can tell, they exist largely because Gibson had a surplus of P90 Les Paul bodies they couldn’t give away. To make use of the design, they acquired a relatively small jazz guitar manufacturer from New York to adopt their Mini humbucker design — which they then mounted in “rings” made from cut-down P90 covers.
Whatever the truth behind the story, that’s how Mini humbuckers became part of the mainstream, and how Epiphone ended up with them.
Basically, they’re smaller than “proper” humbuckers and somewhat limited in what they can do, coming in two main “flavours”:
Traditional — with six exposed screw poles and a covered “rail” pole on the other coil. Almost always wound to 6K, sitting atop a bar magnet.
Firebird — a completely enclosed cover with two bar magnets pressed into the coils. Weirdly, they don’t behave all that differently from the traditional version, considering how unusual the construction is. They’ve had a bit of a resurgence in recent years.
Personally, I’ve never been a huge fan. In my opinion, “once you’ve tried one, you’ve tried them all,” since the size and shape limitations make them all sound pretty similar. They’re a lot less defined than a normal humbucker, soupier under gain, but incredibly pleasing if you keep things clean and classy.
Interestingly, there’s a lot of confusion around size. Most Mini humbucker rings are designed to accept a 68 mm pickup, so technically 68 mm Mini humbuckers should exist. In practice, though, I’ve never seen one — my suspicion is that the pickups themselves are actually closer to 65 mm where it matters, and the “68 mm” spec only applies to the flared base.
In situ I think it’s fair to say that, on the pickguard, it’s pretty clear there’s something not quite right with the routing, isn’t it? That route is 68.5 mm × 28.5 mm, with the correct radii in the corners — and, even I’ll admit, it’s a little gappy.
Sadly, I’m playing this a bit by ear. I’ve got covers (and pickups) from a few different manufacturers in front of me, and they’re all slightly smaller than 68 mm × 28 mm. That said, it seems the entire industry is working to those numbers, so I’ve got to fly with the wind a little and route our plates to match that, purely because there’s a very real chance your pickup will be exactly those dimensions.
In short, just because all of my examples are slightly under, doesn't mean all pickups are slightly under.
Good Company
And before everyone tells me, “Craig, that’s stupid — if the pickup is 65 mm long, then route the pickguards to match!” — I agree! Honestly, I do. But everyone else is working to 68 mm length. Remember those cut-down P90 covers? They’re assuming 68 mm — and, with the examples I’ve got here, we’re seeing the same gapping around the route.
Weirdly, even though the dimensions of the route are exactly the same, the gapping looks less. I assume it’s some trick of the eye, and the shadow gap hides a multitude of sins. If we deep dive a little (and, clearly, I have!) — we can see the same shadow gap on Gibson Les Paul Deluxe and even Firebirds, which gives further credibility to this being a fairly wide-ranging quirk.
Full Disclosure
I’m in a bit of a tricky spot here — I could, quite easily, tweak the routes on my end and make a mini humbucker cavity 65 × 27 mm (in the same way I could make a Gibson P90 route). The thing is, very few people actually measure these pickups. More often than not, the first you’ll know your Mini HB is smaller than expected is when you try to fit it into the route.
Honestly, it’s better to err on the side of a slightly bigger hole than a smaller one. It saves a lot of “What size is my mini humbucker? No clue, sorry!” emails, and, frankly, it aligns with how the industry tends to do things.
If there’s enough demand, I’m absolutely open to creating a more precisely sized route — but so far, it hasn’t come up. This approach keeps things simple and practical, without anyone losing sleep over it.
.
Colours
Ok, even I’ll concede this isn’t the most thrilling topic at this stage — but there’s a surprising amount of confusion around the various “off-white” pickguard colours. And seeing as we’re already ticking off pearls and tortoise shell variants, we might as well tackle the parchments, mints and creams too.
So, let’s get stuck in.
White
All our white plates use this exact shade — a fully opaque pigment with no translucency or ageing tint. It’s exactly what most people picture when they think “white pickguard”: clean, crisp, and pristine.
It doesn’t try to mimic vintage plastics or look “aged in,” so if you’re after a bright factory-fresh look — or you’re pairing it with bold or modern colours — this is the one.
Parchment
Sometimes sold as “aged white,” parchment sits one step in from pure white. It’s a touch darker, with a hint of cream or yellow in the mix — think along the lines of old newspaper or paper that’s had a few decades to mellow.
It’s a great middle ground if you don’t want the starkness of bright white, but you’re not ready to dive into full-on cream or mint territory.
Mint A
The lighter of the two mint shades. It’s not actually all that common on production guitars, which surprises a lot of people, because this is the tone most folks picture when they think “mint green.” It’s subtle, soft, and only just tinted — enough to take the edge off white without straying into cream.
Mint B
The “proper” mint green. Darker than Mint A, with a subtle grey undertone that gives it depth. Be warned — it does not photograph well and will often be corrected by cameras into something lighter or more vibrant than it actually is. In real life, it’s a rich, deep green, much closer to the discoloured nitrate plastics of the 1960s, which this colour originally sought to replicate.
Ivory
Ivory — sometimes called “Creme,” particularly in Gibson parlance — is a warm, buttery shade with a hint of orange. It’s not commonly seen on Fender-style pickguards, which makes it a bit special, but personally, I absolutely love the richness it brings to a build.
Black
Black is, well… black. There’s not a huge amount to say about it — it’s opaque, crisp, and very classy. I particularly like the contrast it creates on 3-ply pickguards with a white middle layer; it just works.
Mint Green Notes
Before we dive any deeper into colours, a few things are worth flagging about Mint Green — it’s a tricky shade and often comes across completely differently in photos.
First, if you’ve looked at the “real” photos of Mint A and Mint B, you’ve probably noticed they look almost identical. That’s not a mistake — cameras genuinely struggle to capture the subtle differences. They tend to auto-correct everything toward a washed-out Mint A, regardless of the actual plate.
So, why bother showing photos at all? Well, the unedited images highlight how misleading camera shots can be. From here, you have to trust the edited examples above, or the colour swatch in the pickguard customiser — that’s a very accurate representation of what the plates look like in real life.
The takeaway? Don’t rely on photos when judging Mint Green. If I’ve had this problem, so has everyone else. A quick search online will show you at least ten subtly different mint shades on Fender guitars — but in reality, Fender almost always used Mint B (with the exception of Fender Japan). Over the last 20 years, I’ve come across just four actual Mint Green shades: B, A, a very bright “snot” green, and a slightly lighter version of B that’s still pretty close.
Mint B
Unedited, Mint B looks nothing like this in real life. It’s a much darker green, with an almost greyish tint that gives it that classic, slightly aged 60s vibe.
Mint A
Mint A is actually quite close to this, though in real life it’s a bit more vibrant and not quite as “washed out” as the photo suggests.
Comparison
When Mint A and Mint B are photographed side by side, alongside a few other colours (in this case, White and Parchment), it provides a much clearer sense of the differences between the shades.
Ivory vs. Ivory/Black/Ivory
We actually carry two different Ivory plates. There is Ivory , available in a 3-ply Ivory/Ivory/Ivory version and a single-ply version, and we also have Ivory/Black/Ivory 3-ply, which is now obsolete but survives in old stock.
These are not the same colour. The Ivory/Black/Ivory plates will not match Ivory single-ply or Ivory/Ivory/Ivory plates. The I/B/I plates are closer to a nicotine yellow, whereas the I/I/I plates are much more of an orange “cream.”
Pearloids Explained
Pearloid pickguards are often lumped in with tortoiseshells, but they occupy their own, slightly shinier niche. They’re not as subtle as tortoiseshells — the swirls and patterns are more pronounced, with a pearlescent effect that catches the light beautifully. Historically, they’ve been a relatively straightforward affair: virtually all pearloid pickguards are made from PVC, and there isn’t a deep, mysterious backstory like some of the vintage materials.
What makes them interesting is less about origin and more about aesthetics. The colour and pattern variations are deliberate but consistent, making it fairly easy to anticipate how they’ll look on a finished guitar. Unlike tortoiseshell, which can shift dramatically from manufacturer to manufacturer, pearloid maintains a stable palette. That said, the swirl direction, density, and shine can give each plate a little personality — no two are ever perfectly identical.
In short, if you’re after a classic, eye-catching pickguard with a bit of sparkle, pearloid is a solid, no-fuss choice that’s stood the test of time.
White Pearl
White Pearl is the most common pearloid you’ll encounter, and its look is instantly recognisable: subtle, shimmering, and classic. Fun fact — pearloid was originally designed as a faux “mother of pearl,” meant to mimic the iridescent inner layer of oyster shells. The result is a clean, elegant pickguard that catches the light in a way that flat colours just can’t match.
Aged White Pearl
Aged White Pearl is actually more common than you might expect. Think of it as the pearloid equivalent of Parchment — slightly warmer, with a subtle creamy tint. The “pearling” is a bit tighter than standard White Pearl, with fewer blank spots between the reflective areas, giving it a more consistent, refined shimmer.
Grey Pearl
Grey Pearl isn’t my personal favourite. It started appearing a few years ago and was often misrepresented as “Black Pearl” in photos and marketing, but in reality, it’s nowhere near that dark. The grey tone gives a muted, subtle look, but it lacks the contrast and depth that makes other pearloids so appealing.
Avalon
Avalon is a relatively new pearloid pattern, and it gets much closer to the “mother of pearl” aesthetic that the original pearloids were trying to emulate. Instead of being broken into small reflective squares, the pattern flows with swirls and blotches, giving it a crisp, natural finish that really catches the light.
Abalone
If Avalon leans toward a mother-of-pearl look, Abalone is its more exotic counterpart, inspired by the iridescent inside of certain marine snail shells. The pattern is strikingly unique, favoring flowing swirls over the blocky reflective squares, giving it a vivid, eye-catching appearance.
Black Pearl
Black Pearl is always a bit contentious—it's not truly black, more of a dark grey. There is a slightly deeper version known as "Moto Pearl" (though tracking it down is another story), but both shades have their uses depending on the aesthetic you’re after.
Pearloid Quirks
Pearloid plates do have a few quirks of their own. While the material is relatively consistent, the way the “pearl” swirls are distributed can vary a lot from sheet to sheet. You might find sections with tight, dense pearling or areas that are more open and sparse. This isn’t a defect—just the nature of how the pattern is formed.
Additionally, colors can shift slightly depending on lighting and viewing angle, so a plate that looks crisp under one light may appear softer or more muted under another. It’s worth keeping this in mind when matching to existing finishes or other pickguards.
Shade Differences
When viewed on their own, pearloid plates can be tricky to compare, as the swirling patterns and reflections tend to dominate the eye. This is why side-by-side comparisons are so useful.
A good example shows Black Pearl and Grey Pearl next to each other, alongside Aged White Pearl and standard White Pearl. In this arrangement, the subtle differences in base color, contrast, and reflectivity become much clearer, helping you make a more informed choice.
Knobs
Pearloid pickguards present a unique challenge when it comes to matching knobs, tips, and covers, simply because the base color isn’t uniform. Here’s a practical approach:
Aged White Pearl pairs best with Parchment-colored plastics.
White Pearl and Avalon work well with standard White plastics.
Black Pearl doesn’t match true black knobs perfectly. In fact, it highlights the fact that Black Pearl isn’t genuinely black—but it’s about as close as you’re going to get.
3 and 4 Ply
Pearloid pickguards can be a bit confusing when it comes to ply count, because they don’t always follow the standard dark/light/dark pattern we’ve come to expect.
Essentially, the pearloid layer on the front of the plate counts as a ply. This means:
3-ply pearloid plates can appear as just 2 plys, especially on lighter pearls where the pearloid layer is semi-transparent and looks white.
4-ply pearloid plates often appear as 3 plys.
In this photo, you can just make out the individual plys and how they layer together.
Tortoise Shells
You’ve probably noticed that we do a huge variety of tortoise shell pickguards – and even then, we barely scratch the surface of the available styles.
Originally, tortoise shell pickguards were made from actual tortoise shell – pieces carefully shaped, joined, and polished until semi-transparent. Some of the earliest acoustic pickguards were made this way. Of course, nobody wants to go back to that practice, but people loved the look. When plastics came along in the early 20th century, they offered a much cheaper and more practical alternative. (Trade in hawksbill turtle shells didn’t become illegal until the 1970s.)
The first plastic tortoise shells were made from celluloid . It’s semi-transparent, with a kind of leopard-skin effect, and it looked gorgeous. Celluloid made its way onto guitars, mostly acoustics, and eventually electrics by the late ’50s and early ’60s. The problem? Celluloid is extremely flammable. Cutting it generates heat, storage is risky, and it’s generally unstable – prone to warping, shrinking, and colour changes under sunlight.
Today, tortoise shells are mostly made from Polyoxymethylene (more stable, but still flammable) or PVC (extremely durable, though it gives off toxic fumes if burned).
For modern pickguards, we typically work with five main variants (ignoring the rare, historical celluloid options). While celluloid still exists and looks incredible for historical accuracy, it’s extremely expensive, difficult to source, and high risk to work with. As a rough guide, sourcing a single celluloid plate could cost upwards of £150.
Classic
This is a funny one. For the longest time, it was the only tortoise shell we had access to, and honestly – it’s fine. You see it fairly often on mid-priced guitars like the Squier® Classic Vibe and Vintage Modified lines.
Personally, I think of it as a “cheat” tortoise shell, because it appears to be a screen print sandwiched between layers of PVC. That gives it a slightly flat look, but it’s very uniform. So, if consistency is your goal and you want all your tortoise shells to look the same, Classic is the way to go.
3 Ply Brown
Now we’re talking. Unlike the “flat layer” version, 3 Ply Brown is the real deal – multiple semi-transparent PVC layers (usually one yellow, one brown) overlaid to create that classic tortoise shell effect.
For whatever reason, the 3-ply version tends to show a little more yellow in the mix than the 4-ply, giving it extra depth and richness. If pressed, I’d say it’s my favourite of the tortoise shells.
4 Ply Brown
Slightly darker than the 3-ply version, the 4-ply shows less yellow bleed-through in the mix—presumably because the yellow layer is thinner. The overall effect is a richer, more subdued tortoise shell look, while still retaining that classic depth.
3 Ply Red
Much like the 3-ply brown, this version layers yellow and red PVC, one on top of the other. The principle is the same, but the result is a more vibrant, warmer tortoise shell, giving a slightly livelier appearance on the pickguard.
4 Ply Red
In the 4-ply red, the yellow layer is largely removed, leaving a deep, rich red that almost approaches a red pearloid. It’s clean, vibrant, and avoids the subtle yellow tinge you see in the 3-ply version — perfect if you want a striking, uniform red tortoise effect.
Celluloid
For completeness, here’s a look at a celluloid plate. It’s absolutely gorgeous, with incredible depth to the “shell” effect that PVC can’t quite replicate. That said, if you look closely, you’ll notice this Jazzmaster plate has warped significantly. It’s been stored under the same conditions as the PVC plates, but celluloid simply doesn’t age as well — beautiful, but far less stable.
A Quick Note on Returns for These Plates
These plates are made to order, based entirely on the specifications you choose—pot hole positioning, pickup routing, and any other tweaks. Because of this, they’re classed as custom work and fall under the relevant section of our Terms & Conditions.
Once we’ve made a plate to your chosen spec, it becomes non-returnable and non-refundable . Even if the product page shows a “standard” configuration, that’s just a starting point—every plate is individually built to your selections.
Before hitting “buy,” please double-check that everything is exactly how you want it. We’ve made it as easy as possible to be confident in your order:
We want you to feel confident in your order—and we’re here to help if you have any questions.
Once it’s made, it’s yours: no returns, no refunds.
FAQs
Will this pickguard fit <INSERT GUITAR MODEL HERE>?
Alright, I’ve typed this out in emails tens of thousands of times, and honestly? The answer is still the same:
“I DON’T KNOW.”
No one really does—not with total, unwavering certainty. And here’s why:
1. The sheer variety of guitars
I (and any guitar tech, shop employee, or parts specialist) see a tiny cross-section of guitars each year. There are models I’ve never seen in the flesh, let alone held in my hands for a pickguard swap. Some makes and models won’t even come onto my radar until an email or call mentions them.
There’s no “Haynes manual” for pickguards. Even Fender® doesn’t publish a spec sheet for every Strat®, Tele®, or Les Paul®. Knowledge here is largely a hive mind thing—shared between techs, enthusiasts, and shop staff. I generally only know if a pickguard fits when someone tells me it worked (or didn’t). Feedback is everything.
2. Pickguards aren’t truly standardized
It’s a common assumption, but not entirely true. There are recognized specs—take Stratocasters®, for example: 1954–57, 1958–62, and 1963 onward. Mounting screw positions remain consistent in those ranges.
But even within those ranges, guitars can be slightly “off.” A hole might move 2 mm, a tremolo cavity might be 1 mm smaller, or a humbucker route could shift 5–6 mm. Sometimes these changes are factory experiments, sometimes they’re just quirks. By the next production run, everything might snap back to the standard.
So yes—a pickguard that fits one guitar of the same model may not fit another produced a week later.
What’s the best advice for checking fit?
Measure it yourself. Technical Specification tab for diagrams. Measure centre-to-centre on holes, edge-to-edge on the shortest sides, and allow a small tolerance for measurement error. It’s a two-minute job.
What if it fits physically, but screw holes don’t line up?
Options:
Option 1 – Modify your guitar:
Option 2 – Custom pickguards:
“I’ve received my pickguard and it’s VERY scratched.”
Chances are, what you’re seeing isn’t actually scratches on the pickguard itself—it’s the protective plastic film applied to the surface during manufacturing and shipping.
This thin sheet is designed to shield your pickguard from scuffs, scratches, and dust while it’s being made, packed, and shipped. It’s completely normal for this film to look a bit worn or scratched—the good news is, that means the pickguard underneath is still pristine.
What to do: Carefully peel off the protective film before installing your pickguard. You’ll reveal the flawless, shiny surface underneath.
If you do spot any marks after removing the film, please get in touch—we want to make sure every pickguard leaves here looking perfect.
Ply - Single or 3 ply
Finish - Gloss
Edge - Chamfered
Pickup Route - HB
Screw Config - 11 Hole
ealed with a protective sheet.
SCHB Wiring Loom
This is an
SCHB wiring loom, built specifically to match the control layout you've designed under the "Customise Controls" section.
Rather than following a fixed factory specification, the loom is built around your chosen control layout. For example, if you've specified two controls instead of the traditional three, the loom will be wired as a
Master Volume and Master Tone , regardless of where those controls are physically positioned on the pickguard. If you've chosen a single control, the loom will be wired as a Master Volume only.
There are two important things to bear in mind with this wiring loom.
Firstly, it doesn't matter where the two pickups are positioned on the pickguard—only that there is
one single coil and one humbucker (or P90-style pickup) . Whether you've designed a Bridge & Neck layout, Bridge & Middle, or Middle & Neck, the loom is built to suit.
Secondly, the loom isn't concerned with the exact pickup models you've chosen. A Telecaster® bridge pickup with a Mini Humbucker® neck? No problem. A Stratocaster® middle pickup with a Covered Humbucker® neck? Equally at home. As long as the pickup combination follows the SCHB format, the loom will work.
Because this is a mixed pickup configuration, there are a few additional technical considerations.
The loom is built around
500k CTS potentiometers , which are ideal for humbuckers and P90-style pickups. To ensure the single coil still "sees" a load much closer to the traditional 250k value, a resistor is switched into the circuit whenever the single coil is selected. This gives both pickup types a much more appropriate load without compromising either.
When using the middle switch position, the humbucker
must be coil-split, exactly as shown in the wiring diagram. If you're using a traditional 2-conductor humbucker , the loom will still function, but you'll need to install a small jumper between the two humbucker live terminals on the switch and ignore the red and white coil-split connections.
In this configuration, both humbucker coils remain active alongside the single coil, resulting in three coils operating together. This can produce significant phase cancellation and a noticeably thinner sound. For the best results, we strongly recommend using a
4-conductor humbucker , allowing the humbucker to split correctly in the middle position.
It's also worth ensuring that the
south (screw) coil of the humbucker—the coil that remains active when split—is opposite in magnetic polarity and electrical phase to the single coil. This provides the traditional hum-cancelling "in-between" sound that many players are looking for.
There are a few details that are open to interpretation, such as the tone capacitor and, occasionally, potentiometer values. If your chosen specification suggests a more appropriate combination, we'll contact you before building your loom to discuss the options. As standard, however, this loom is built using
500k CTS Audio Taper potentiometers and a 0.022µF Cornell Dubilier tone capacitor .
Your loom will also be wired to match the switch you've selected under the
"Wiring" section.
3-Way Switching
Pickup #1 (typically the Bridge pickup)
Pickup #1 + Pickup #2 (wired in parallel, with the humbucker coil-split)
Pickup #2 (typically the Neck pickup)
Where two tone controls are present, the loom is wired using the traditional Stratocaster® arrangement:
This isn't set in stone, and we're more than happy to accommodate alternative tone assignments if you have a particular preference. We've intentionally kept these options out of the customiser to avoid making the ordering process unnecessarily complicated, but if you'd like something different, simply let us know when placing your order.
Please note: This wiring loom does not include pickups. You'll need to connect your own pickups following the wiring diagram below.
As this is a traditional soldered (point-to-point) wiring loom , you'll need to solder:
Your pickup connections to the circuit. The output jack (mono socket). The bridge/tremolo claw ground wire.
If you'd prefer to avoid soldering, our solderless wiring looms allow all of these connections to be made using screw terminals instead.
This is a
solderless wiring loom, so there's no soldering required .
Your pickups connect directly to clearly labelled screw terminals, making installation quick, straightforward, and completely reversible if you ever decide to change pickups in the future.
The output jack (mono socket) is already pre-wired, and the bridge ground is supplied on a replacement tremolo claw. Both are fitted to screw terminals and can be easily disconnected while feeding the wiring through the guitar's routing, then reconnected once everything is in place.
As with all of our wiring looms,
pickups are not supplied and must be connected during installation.
HBSC Wiring Loom
This is an
HBSC wiring loom, built specifically to match the control layout you've designed under the "Customise Controls" section.
Rather than following a fixed factory specification, the loom is built around your chosen control layout. For example, if you've specified two controls instead of the traditional three, the loom will be wired as a
Master Volume and Master Tone , regardless of where those controls are physically positioned on the pickguard. If you've chosen a single control, the loom will be wired as a Master Volume only.
There are two important things to bear in mind with this wiring loom.
Firstly, it doesn't matter where the two pickups are positioned on the pickguard—only that there is
one humbucker (or P90-style pickup) and one single coil . Whether you've designed a Bridge & Neck layout, Bridge & Middle, or Middle & Neck, the loom is built to suit.
Secondly, the loom isn't concerned with the exact pickup models you've chosen. A Mini Humbucker® bridge with a Telecaster® middle pickup? No problem. A full-size Covered Humbucker® bridge with a Stratocaster® neck pickup? Equally at home. As long as the pickup combination follows the HBSC format, the loom will work.
Because this is a mixed pickup configuration, there are a few additional technical considerations.
The loom is built around
500k CTS potentiometers , which are ideal for humbuckers and P90-style pickups. To ensure the single coil still "sees" a load much closer to the traditional 250k value, a resistor is switched into the circuit whenever the single coil is selected. This gives both pickup types a much more appropriate load without compromising either.
When using the middle switch position, the humbucker
must be coil-split, exactly as shown in the wiring diagram. If you're using a traditional 2-conductor humbucker , the loom will still function, but you'll need to install a small jumper between the two humbucker live terminals on the switch and ignore the red and white coil-split connections.
In this configuration, both humbucker coils remain active alongside the single coil, resulting in three coils operating together. This can produce significant phase cancellation and a noticeably thinner sound. For the best results, we strongly recommend using a
4-conductor humbucker , allowing the humbucker to split correctly in the middle position.
It's also worth ensuring that the
south (screw) coil of the humbucker—the coil that remains active when split—is opposite in magnetic polarity and electrical phase to the single coil. This provides the traditional hum-cancelling "in-between" sound that many players are looking for.
There are a few details that are open to interpretation, such as the tone capacitor and, occasionally, potentiometer values. If your chosen specification suggests a more appropriate combination, we'll contact you before building your loom to discuss the options. As standard, however, this loom is built using
500k CTS Audio Taper potentiometers and a 0.022µF Cornell Dubilier tone capacitor .
Your loom will also be wired to match the switch you've selected under the
"Wiring" section.
3-Way Switching
Pickup #1 (typically the Bridge pickup)
Pickup #1 + Pickup #2 (wired in parallel, with the humbucker coil-split)
Pickup #2 (typically the Neck pickup)
Where two tone controls are present, the loom is wired using the traditional Stratocaster® arrangement:
This isn't set in stone, and we're more than happy to accommodate alternative tone assignments if you have a particular preference. We've intentionally kept these options out of the customiser to avoid making the ordering process unnecessarily complicated, but if you'd like something different, simply let us know when placing your order.
Please note: This wiring loom does not include pickups. You'll need to connect your own pickups following the wiring diagram below.
As this is a traditional soldered (point-to-point) wiring loom , you'll need to solder:
Your pickup connections to the circuit. The output jack (mono socket). The bridge/tremolo claw ground wire.
If you'd prefer to avoid soldering, our solderless wiring looms allow all of these connections to be made using screw terminals instead.
This is a
solderless wiring loom, so there's no soldering required .
Your pickups connect directly to clearly labelled screw terminals, making installation quick, straightforward, and completely reversible if you ever decide to change pickups in the future.
The output jack (mono socket) is already pre-wired, and the bridge ground is supplied on a replacement tremolo claw. Both are fitted to screw terminals and can be easily disconnected while feeding the wiring through the guitar's routing, then reconnected once everything is in place.
As with all of our wiring looms,
pickups are not supplied and must be connected during installation.
SCSC Wiring Loom
This is a
Two Single Coil (SCSC) wiring loom, built specifically to match the control layout you've designed under the "Customise Controls" section.
Rather than following a fixed factory specification, the loom is built around your chosen control layout. For example, if you've specified two controls instead of the traditional three, the loom will be wired as a
Master Volume and Master Tone , regardless of where those controls are physically positioned on the pickguard. If you've chosen a single control, the loom will be wired as a Master Volume only.
There are two important things to bear in mind with this wiring loom.
Firstly, it doesn't matter where the two pickups are positioned on the pickguard—only that there are
two single coil pickups . Whether you've designed a Bridge & Neck layout, Bridge & Middle, or Middle & Neck, the wiring loom will work perfectly.
Secondly, the loom doesn't really care what type of single coil pickups you've chosen. Traditional Stratocaster® single coils, Telecaster® pickups, and other low-inductance single coil designs are all electrically very similar, and are perfectly suited to the
250k CTS potentiometers supplied with the loom.
There are a few details that are open to interpretation, such as the tone capacitor and, occasionally, potentiometer values. If your chosen pickup combination suggests a more appropriate specification, we'll contact you before building your loom to discuss the options. As standard, however, this loom is built using
250k CTS Audio Taper potentiometers and a 0.022µF Cornell Dubilier tone capacitor .
Your loom will also be wired to match the switch you've selected under the
"Wiring" section.
3-Way Switching
Pickup #1 (for example, the Bridge pickup)
Pickup #1 + Pickup #2 (wired in parallel)
Pickup #2 (for example, the Neck pickup)
Where two tone controls are present, the loom is wired using the traditional Stratocaster® arrangement:
This isn't set in stone, and we're more than happy to accommodate alternative tone assignments if you have a particular preference. We've intentionally kept these options out of the customiser to avoid making the ordering process unnecessarily complicated, but if you'd like something different, simply let us know when placing your order.
Please note: This wiring loom does not include pickups. You'll need to connect your own pickups following the wiring diagram below.
As this is a traditional soldered (point-to-point) wiring loom , you'll need to solder:
Your pickup connections to the circuit. The output jack (mono socket). The bridge/tremolo claw ground wire.
If you'd prefer to avoid soldering, our solderless wiring looms allow all of these connections to be made using screw terminals instead.
This is a
solderless wiring loom, so there's no soldering required .
Your pickups connect directly to clearly labelled screw terminals, making installation quick, straightforward, and completely reversible if you ever decide to change pickups in the future.
The output jack (mono socket) is already pre-wired, and the bridge ground is supplied on a replacement tremolo claw. Both are fitted to screw terminals and can be easily disconnected while feeding the wiring through the guitar's routing, then reconnected once everything is in place.
As with all of our wiring looms,
pickups are not supplied and must be connected during installation.
SCSCSC Wiring Loom
This is an
SCSCSC wiring loom , built specifically to match the control layout you've designed under the "Customise Controls" section.
The loom follows your chosen control layout rather than a fixed factory specification. For example, if you've chosen a two-control layout instead of the traditional three controls, the loom will be wired as a
Master Volume and Master Tone , regardless of where the controls are physically positioned on the pickguard. If you've chosen a single control, the loom will be wired as a Master Volume only.
250k "Vintage Audio Taper", Split shaft CTS pots , and a 0.0.022µF Cornell Dubilier capacitor, and a short thread Swiftcraft Mono Socket.
Your loom will also be wired to match the switch you've selected under the
"Wiring" section.
5-Way Switching
Bridge
Bridge + Middle (parallel)
Middle
Middle + Neck (parallel)
Neck
3-Way Switching
Bridge
Middle
Neck
Where two tone controls are present, the loom is wired to the traditional Stratocaster® arrangement:
This isn't set in stone, and we're happy to accommodate alternative tone assignments if you have a particular preference. We've intentionally kept these options out of the customiser to avoid making the ordering process unnecessarily complicated, but if you'd like something different, just let us know when placing your order.
Wiring Diagram
Please note: This wiring loom does not include pickups. You'll need to connect your own pickups following the wiring diagram below.
As this is a traditional soldered (point-to-point) wiring loom , you'll need to solder:
Your pickup connections to the circuit. The output jack (mono socket). The bridge/tremolo claw ground wire.
If you'd prefer to avoid soldering, our solderless wiring looms allow all of these connections to be made using screw terminals instead.
This is a
solderless wiring loom, so there's no soldering required .
Your pickups connect directly to clearly labelled screw terminals, making installation quick, straightforward, and completely reversible if you ever decide to change pickups in the future.
The output jack (mono socket) is already pre-wired, and the bridge ground is supplied on a replacement tremolo claw. Both are fitted to screw terminals and can be easily disconnected while feeding the wiring through the guitar's routing, then reconnected once everything is in place.
As with all of our wiring looms,
pickups are not supplied and must be connected during installation.
...
HBHB Wiring Loom
This is an
HBHB wiring loom , built specifically to match the control layout you've designed under the Customise Controls section.
Rather than following a fixed factory specification, every loom is built around the control layout you've created. For example, if you've chosen a two-control layout instead of the traditional three controls, your loom will be wired as
Master Volume / Master Tone , regardless of where those controls are physically positioned on the pickguard. If you've chosen a single control, the loom will be wired as a Master Volume only.
One important thing to remember is that this loom doesn't really care what type of pickups you've selected. Whether you've designed a traditional
HH® layout, a P90® bridge with a Mini Humbucker® neck , or something even more unusual, electrically they all require the same style of circuit and are generally best suited to 500k CTS potentiometers .
So, technically, this isn't strictly an "HH wiring loom" at all—it's really a wiring loom for
any two-pickup configuration that traditionally uses 500k controls . "HBHB" is simply a much easier way to describe it!
There are a few details that are open to interpretation, however. The tone capacitor—and occasionally the potentiometer values—are good examples. If your chosen pickup combination would benefit from something different, we'll contact you before building your loom to discuss the options. As standard, this loom is built using
500k CTS audio taper potentiometers and a 0.022µF Cornell Dubilier tone capacitor .
Your loom will also be wired to match the switch you've selected under the
Wiring section.
3-Way Switching
Bridge
Bridge + Neck (parallel)
Neck
Where two tone controls are present, the loom is wired using the traditional two-humbucker arrangement:
This isn't set in stone, and we're more than happy to accommodate alternative tone assignments if you have a particular preference. We've intentionally kept these options out of the configurator to keep the ordering process as straightforward as possible, but if you'd like something different, simply let us know when placing your order.
Wiring Diagram
Please note: This wiring loom does not include pickups. You'll need to connect your own pickups following the wiring diagram below.
As this is a traditional soldered (point-to-point) wiring loom , you'll need to solder:
Your pickup connections to the circuit. The output jack (mono socket). The bridge/tremolo claw ground wire.
If you'd prefer to avoid soldering, our solderless wiring looms allow all of these connections to be made using screw terminals instead.
This is a
solderless wiring loom, so there's no soldering required .
Your pickups connect directly to clearly labelled screw terminals, making installation quick, straightforward, and completely reversible if you ever decide to change pickups in the future.
The output jack (mono socket) is already pre-wired, and the bridge ground is supplied on a replacement tremolo claw. Both are fitted to screw terminals and can be easily disconnected while feeding the wiring through the guitar's routing, then reconnected once everything is in place.
As with all of our wiring looms,
pickups are not supplied and must be connected during installation.
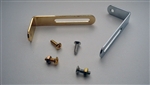
Parts Specifications
Weight - 21g
Screw Thread - #6-32
Materials Frame and Arm - Steel
Board - Bakelite
Terminals - Brass
Pots
Knob Shaft - 5.9mm, knurled
Tolerance - +/- 10%
Supplied with 1 Mounting Nut, 1 Washer and 1 "Star" washer


 Not perfect fit