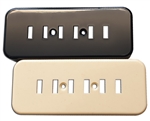
Description
Customisation?
Colours Explained?
Warranty & Returns
FAQ
Wiring
Specifications
This is the Stratocaster® pickguard most players will recognise when working on a modern Fender Stratocaster. It represents the final stage in the evolution of the classic Strat pickguard design.
In simple terms, it’s a refinement of the early ‘60s specification. The key difference is the mounting screw between the neck and middle pickups, which was moved slightly closer to the middle pickup rather than sitting directly between the two. This change was likely introduced to reduce one of the common weak points on earlier pickguards, which were prone to warping over time.
This modern 11-hole pickguard layout came into production around 1983 and has remained the standard on most USA and Mexican-made Fender® guitars ever since. The main exceptions are reissue and signature models, which often replicate earlier specifications.
One important thing to note is that Squier® and Fender® Japan models do not always follow this standard. These can vary quite a bit, and we regularly see different hole patterns and specifications. If you’re unsure, it’s always worth checking measurements carefully. We’ve provided detailed technical diagrams to make matching your pickguard as straightforward as possible.
About the Pickguard
This Stratocaster® pickguard is made from a 3-ply PVC laminate, chosen because it offers the best balance of durability and stability.
While other plastics have been used historically, most come with drawbacks. They may be accurate to vintage specs, but they can be less stable in everyday use. PVC is far more resistant to heat and warping, and it maintains its colour over time. Like any material, it can still show signs of ageing such as nicotine staining or sun bleaching, but it performs far better than most alternatives.
If you’re running a standard set of single coils and need a reliable modern replacement, this is almost certainly the pickguard you’re looking for.
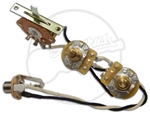
Pre-Wired Control Loom
Looks like you're adding a pre-wired control loom to your order!
This effectively turns your pickguard into a loaded plate — a pickguard for a Fender® Stratocaster® supplied with the volume control, tone controls, and switch already installed and wired to match the pickup configuration and control layout you've designed. Simply connect your pickups and output jack, and you're ready to go.
Unlike some of our other loaded assemblies, this option includes the wiring loom only. Knobs, switch tip, pickup covers, and pickups are not supplied unless they have been added separately to your order, and are available under the "Extra parts" menu.
Each control loom is assembled using high-quality components, including CTS 250k vintage audio taper potentiometers as standard, a 3-way or 5-way Oak Grigsby switch (depending on your chosen specification), a 0.022µF Cornell Dubilier tone capacitor, and a Switchcraft mono output jack.
The result is a professionally assembled, reliable wiring harness built to match your exact specification.
A Closer Look — And What to Look Out For
Mounting Holes
1954–57 (early vintage / 8-hole system) 8-hole mounting pattern . These are most commonly found on vintage reissues and represent the earliest production specification before the layout was refined.
Structurally, this design is the least stable of the Strat® family. With fewer mounting points and a tendency toward thinner 1-ply material, these plates are more prone to warping over time, particularly “environmental” movement.
Important note on overlap (reissue era production) 54–57, 58–62, and 63–70 spec pickguards can appear across 1971–82 instruments , depending on production line and intended specification.
Pickup and Switch Bolts
1954–57
A notable design quirk
Humbucker and non–single coil configurations
54–82 vintage-spec pickguards
This is intentional, reflecting real-world pickup construction standards: while Fender® used countersunk mounting for Strat® single coils and switches during the vintage era, most other pickup types have always relied on dome head or surface-mounted hardware.
Truss Rod Access
1954–57 (early vintage / pre-notched specification)
Early 1950s Stratocaster® models pre-date the introduction of the truss rod access notch system.
Officially, these instruments require neck removal for truss rod adjustment , as the pickguard does not provide access to the heel-adjust mechanism.
In practical terms, however, this was rarely treated as a strict service procedure. Many instruments from this era show evidence of users manually modifying pickguards to create their own access relief, effectively “backdating” the later notch concept before it was standardised.
For this reason, our 1954–57 specification includes a functional access notch , reflecting the way these instruments are commonly encountered in real-world condition, even if it is not strictly period-correct to original factory output.
Edges
1954–57 (1-ply era / early Stratocaster® specification)
Early Stratocaster® pickguards from the 1950s were produced as single-ply (1-ply) sheets , always in white and typically around 1.8mm thickness .
This construction is historically accurate, but structurally fragile. Thin 1-ply material is highly susceptible to warping, cracking, and general distortion over time , particularly under changes in temperature and humidity.
For that reason, we do not currently offer thin 1-ply plates in the pickguard customiser. While they are historically correct, they are not well suited to long-term use.
Instead, we offer a reinforced 1-ply option (approx. 2.3mm thick) , which preserves the original flat-face aesthetic and sharp 90-degree edge profile, while significantly improving stability and durability.
We also offer 1950s-spec plates in a range of colours for customers who prioritise aesthetics over strict historical accuracy.
Mounting Holes
1958–62 (transition era / early 11-hole development) 11-hole mounting system , introduced to improve stability and reduce the warping issues seen in earlier plates.10 of the 11 mounting positions match later 63–modern specifications exactly . The only variation is a single screw position on the upper half, between the neck and middle pickup, which shifts as the pattern is refined.bridging specification between early vintage construction and the fully standardised system that follows.
Important note on overlap (reissue era production) 54–57, 58–62, and 63–70 spec pickguards can appear across 1971–82 instruments , depending on production line and intended specification.
Pickup and Switch Bolts
1958–62
A notable design quirk
Humbucker and non–single coil configurations
54–82 vintage-spec pickguards
All non–single coil pickups (e.g. humbuckers, HSS, HSH layouts)
This is intentional, reflecting real-world pickup construction standards: while Fender® used countersunk mounting for Strat® single coils and switches during the vintage era, most other pickup types have always relied on dome head or surface-mounted hardware.
Truss Rod Access
1958–62
Across 1958–1970 Stratocaster® production , instruments used a heel-adjust truss rod system , requiring access at the neck pocket end of the neck.
As a result, pickguards from this period feature a truss rod access notch (“half moon” cut-out) in the neck pocket area, allowing adjustment without removing the neck.
In practice, these notches vary slightly in shape and depth depending on production tolerances — ranging from shallow relief cuts to more pronounced semi-circular recesses.
It is also worth noting that this area is not highly delicate in real-world use. Due to the way the neck sits against the pickguard, truss rod adjustment often results in minor contact between tool and pickguard edge. As a result, wear, marking, or “chewing” of the notch area is extremely common on original vintage instruments , and should be considered normaland should generally be considered normal wear.
Edges
1958-Current
From the late 1950s onward, Stratocaster® pickguards transitioned to multi-ply construction , most commonly 3-ply (or 4-ply in tortoiseshell variants) .
This became the long-term industry standard and is used across all major Stratocaster® production eras through to the present day.
These pickguards are typically:
2.3mm thickness
Finished with a 45-degree bevelled edge
Significantly more stable than early 1-ply designs
For customers who prefer a more vintage or stylistically bold look, we also offer 1-ply “thick” variants in later-era specifications. These are not historically period-correct for post-1950s instruments, but are included because they offer a clean, minimalist aesthetic that many builders prefer.
Mounting Holes
1963–70 (classic vintage specification / standardisation point) 11-hole mounting pattern used across all subsequent Stratocaster® designs .
The key change from earlier layouts is the finalisation of screw positioning, including the relocation of the upper horn screw between the neck and middle pickup to its now-familiar position.truss rod access notch in the neck pocket area , reflecting the pre-bullet truss rod construction used at the time.
Important note on overlap (reissue era production) 54–57, 58–62, and 63–70 spec pickguards can appear across 1971–82 instruments , depending on production line and intended specification.
Pickup and Switch Bolts
1963–70
A notable design quirk
Humbucker and non–single coil configurations
54–82 vintage-spec pickguards
All non–single coil pickups (e.g. humbuckers, HSS, HSH layouts)
This is intentional, reflecting real-world pickup construction standards: while Fender® used countersunk mounting for Strat® single coils and switches during the vintage era, most other pickup types have always relied on dome head or surface-mounted hardware.
Truss Rod Access
1958–70
Across 1958–1970 Stratocaster® production , instruments used a heel-adjust truss rod system , requiring access at the neck pocket end of the neck.
As a result, pickguards from this period feature a truss rod access notch (“half moon” cut-out) in the neck pocket area, allowing adjustment without removing the neck.
In practice, these notches vary slightly in shape and depth depending on production tolerances — ranging from shallow relief cuts to more pronounced semi-circular recesses.
It is also worth noting that this area is not highly delicate in real-world use. Due to the way the neck sits against the pickguard, truss rod adjustment often results in minor contact between tool and pickguard edge. As a result, wear, marking, or “chewing” of the notch area is extremely common on original vintage instruments , and should be considered normaland should generally be considered normal wear.
Edges
1958-Current (3-ply era / standard construction)
From the late 1950s onward, Stratocaster® pickguards transitioned to multi-ply construction , most commonly 3-ply (or 4-ply in tortoiseshell variants) .
This became the long-term industry standard and is used across all major Stratocaster® production eras through to the present day.
These pickguards are typically:
2.3mm thickness
Finished with a 45-degree bevelled edge
Significantly more stable than early 1-ply designs
For customers who prefer a more vintage or stylistically bold look, we also offer 1-ply “thick” variants in later-era specifications. These are not historically period-correct for post-1950s instruments, but are included because they offer a clean, minimalist aesthetic that many builders prefer.
Mounting Holes
1971–82 (CBS-era production refinements) ’71–82 pickguard is mechanically identical to the ’63–70 specification . The mounting pattern remains unchanged and fully interchangeable.bullet truss rod adjustment at the headstock , the traditional truss rod access notch in the neck pocket was no longer required and was removed from production specs.countersunk hardware on switch and pickup mounting points , as production methods began transitioning toward more modern assembly practices.
Important note on overlap (reissue era production) 54–57, 58–62, and 63–70 spec pickguards can appear across 1971–82 instruments , depending on production line and intended specification.
Pickup and Switch Bolts
1971–82
A notable design quirk
Humbucker and non–single coil configurations
All non–single coil pickups (e.g. humbuckers, HSS, HSH layouts)
This is intentional, reflecting real-world pickup construction standards: while Fender® used countersunk mounting for Strat® single coils and switches during the vintage era, most other pickup types have always relied on dome head or surface-mounted hardware.
Truss Rod Access
1971–83–Current
From 1971 onward , Fender® transitioned the Stratocaster® truss rod adjustment point from the neck heel to the headstock (bullet-style adjustment).
This change eliminated the need for a pickguard access notch entirely, and the feature was removed from standard production specifications.
As a result, all 1971–present Stratocaster® pickguards use a closed neck pocket profile , with no truss rod relief cut required.
This design has remained consistent through to modern production, and is only reintroduced on specific vintage reissue models where historical accuracy is required.
Edges
1958-Current (3-ply era / standard construction)
From the late 1950s onward, Stratocaster® pickguards transitioned to multi-ply construction , most commonly 3-ply (or 4-ply in tortoiseshell variants) .
This became the long-term industry standard and is used across all major Stratocaster® production eras through to the present day.
These pickguards are typically:
2.3mm thickness
Finished with a 45-degree bevelled edge
Significantly more stable than early 1-ply designs
For customers who prefer a more vintage or stylistically bold look, we also offer 1-ply “thick” variants in later-era specifications. These are not historically period-correct for post-1950s instruments, but are included because they offer a clean, minimalist aesthetic that many builders prefer.
Mounting Holes
1983–Current (modern standard specification) fully interchangeable with all 63–82 mounting systems .non-countersunk switch and pickup mounting holes , reflecting the adoption of dome-head screw hardware across Fender® manufacturing.63-spec, 71-spec, and modern Strat® pickguard are functionally interchangeable in terms of mounting.
Pickup and Switch Bolts
1983–Current (modern specification)
Humbucker and non–single coil configurations
All non–single coil pickups (e.g. humbuckers, HSS, HSH layouts)
This is intentional, reflecting real-world pickup construction standards: while Fender® used countersunk mounting for Strat® single coils and switches during the vintage era, most other pickup types have always relied on dome head or surface-mounted hardware.
Truss Rod Access
1983–Current (modern specification)
From 1971 onward , Fender® transitioned the Stratocaster® truss rod adjustment point from the neck heel to the headstock (bullet-style adjustment).
This change eliminated the need for a pickguard access notch entirely, and the feature was removed from standard production specifications.
As a result, all 1971–present Stratocaster® pickguards use a closed neck pocket profile , with no truss rod relief cut required.
This design has remained consistent through to modern production, and is only reintroduced on specific vintage reissue models where historical accuracy is required.
Edges
1958-Current (3-ply era / standard construction)
From the late 1950s onward, Stratocaster® pickguards transitioned to multi-ply construction , most commonly 3-ply (or 4-ply in tortoiseshell variants) .
This became the long-term industry standard and is used across all major Stratocaster® production eras through to the present day.
These pickguards are typically:
2.3mm thickness
Finished with a 45-degree bevelled edge
Significantly more stable than early 1-ply designs
For customers who prefer a more vintage or stylistically bold look, we also offer 1-ply “thick” variants in later-era specifications. These are not historically period-correct for post-1950s instruments, but are included because they offer a clean, minimalist aesthetic that many builders prefer.
Fender®, Squier®, Stratocaster® and Strat® are registered trademarks of Fender Musical Instruments Corporation and Axesrus® has no affiliation with FMIC
A few years ago, we stepped away from offering a full “custom pickguard” service. In theory it sounded great — in practice, most requests weren’t for completely new shapes or one-off designs. The vast majority were simply variations of standard Stratocaster® layouts with different controls, pickup combinations, or mounting details.
So instead of running a traditional custom shop, we built something more practical: a modular pickguard system.
Rather than manufacturing every plate entirely from scratch, we now work from a large range of pre-produced specifications and semi-finished stock, allowing us to configure layouts in-house with faster turnaround times, greater consistency, and significantly lower costs than true one-off production.
This approach gives us a huge amount of flexibility while still keeping the process reliable and repeatable.
What Is Customisable? The customiser allows us to configure a wide range of features, including:
Pickup layouts and routing
Control layouts and hole drilling
Vintage and modern mounting specifications
Switch slot configurations
Historic and modern hardware styles
Multiple material and ply constructions
In many cases, plates may be modified in-house to suit the selected specification — including drilling control holes, machining pickup openings, or adjusting switch layouts where required.
How Additional Machining Costs Work One of the biggest advantages of the pickguard customiser is that it doesn’t automatically treat every configuration as a full custom build.
The system analyses the specification you’ve designed and compares it against our existing stock and semi-finished inventory before determining whether any additional machining is actually required.
In simple terms:
This is particularly important because many “custom” configurations aren’t really custom at all. Fender® has produced a huge range of layouts over the years, and once colour, era, routing style, and hardware combinations are accounted for, a surprising number of customer builds already exist within standard manufacturing specs.
Intelligent Stock Matching When a configuration does require modification, the system works progressively to minimise unnecessary machining and keep costs as low as possible.
Rather than immediately treating the order as a fully bespoke build, the customiser attempts to identify:
existing stock plates that already match the required specification
semi-finished plates that can be modified with minimal work
or the closest compatible routing platform available
Only once those options are exhausted does the system fall back to producing the plate from a blank.
This means the pricing reflects the actual manufacturing work required , rather than simply applying a blanket “custom charge” to every non-standard layout.
Why Prices May Vary Between Colours or Materials Because the system works from real inventory and routing compatibility, pricing can occasionally vary between otherwise identical specifications.
For example:
a particular configuration in one colour may already exist as a stock or semi-finished plate requiring little to no modification
while the same specification in another material or colour may require substantially more machining work from a blank
Although this can occasionally look inconsistent at first glance, it ensures customers are only charged for the work genuinely required to produce their chosen specification.
In practice, it’s a much fairer system than applying fixed “custom shop” pricing across the board.
Pot Hole Drilling Control hole drilling is always included free of charge.
Changing pot values, switch sizes, or control layouts typically involves minimal additional work during production, so these adjustments are treated as part of the normal configuration process wherever possible.
Available Hole Sizes We currently offer four standard drilled hole sizes:
10 mm → Standard control pots
8 mm → "metric/undersized" control pots
½″ → Full-size toggle switches
¼″ → Mini-toggle switches
Hole positions remain fixed to the selected layout specification; only the diameter changes depending on the selected hardware.
So — with all that in mind — let’s walk through how to understand where the holes go and how to get the layout you want.
This is probably easier with a diagram — but be warned — while it makes sense, it’s also fairly cluttered.
Diagram Key
10 mm Pot Holes: White
8 mm Pot Holes: I’ve intentionally left these off the diagram for clarity, but their positions mirror the 10mm holes.
¼" Mini Switch Holes: Pink
½" Toggle Switch Holes: Grey
UFO Knobs (~1" diameter) and Switch Tips (9 mm over the slot): Green
The system is smart enough to prevent most overlap issues, but some combinations sneak through. For example, fitting a 10 mm pot in the TD position alongside any switch will get really tight once the knob is installed.
10mm Hole
This is what I’d consider “the standard” size — designed specifically around CTS pots, which use a 3/8" thread (just under 10mm). Interestingly, the industry has largely standardised on 10mm mounting holes even though M8 threaded pots are also very common.
Thankfully, M8 pots fit perfectly well into a 10mm hole, as the dress washer easily covers the clearance and clamps securely against the pickguard.
You can also fit a jack socket into a 10mm hole if you’re so inclined, as most use either M10 or 3/8" threads too. It’s not especially common, but it was briefly used on the Fender Stratocaster during the “Dan Smith” era.
8mm Hole
Once very common — and occasionally a bit of a pain when upgrading electronics — 8mm pot holes are designed for metric pots with M8 threads.
The pots themselves are still extremely common, but these days you’ll usually find them fitted into 10mm holes on both control plates and pickguards. Personally, I’d do the same and not worry about it, as the dress washer comfortably covers the extra clearance.
That said, if you’ve got your heart set on everything being a perfect snug fit, we do still offer 8mm pot holes on request.
1/2" Hole
This one can be a little confusing because we’re still technically talking about “pot holes” — even though a 1/2" hole is really intended for a switch.
Specifically, it’s designed to accept a full-sized toggle switch, typically with either a 1/2" thread (such as a Switchcraft switch) or an M12 thread (used by Alpha and most other manufacturers).
It’s also worth remembering that a 1/2" hole will still happily accept a CTS pot, in much the same way that a 10mm hole will accept an M8 metric pot. So if you’re experimenting with a switch layout and it doesn’t quite work out, it’s not necessarily a complete disaster — you can usually repurpose the hole without issue.
1/4" hole
Not my favourite addition, admittedly — but it does come up from time to time.
1/4" holes are intended for mini switches, and there’s honestly not a lot else you can realistically do with them afterward. The actual hole size is around 6.5mm, which makes it smaller than even the smallest common pot threads.
In other words: if you’re adding a mini switch, make sure you actually want a mini switch!
No Hole
At the risk of stating the obvious: “No Hole” means exactly that — no hole at all.
If you simply don’t want a control or switch position drilled where one would normally appear, this is the option to choose.
And remember: it’s always far easier to drill a hole later than it is to undrill one!
Additional Routing, Combos, and Weird Stuff!
There are a few options within the control layout customisation, which are either combiantions, extra routing or options that neccesitate extra routing, and as such, extra cost. I'll outline those here.
Lever Switch in Middle Tone pot Position
I, genuinely, love this one - its not REALLY a replacement for a tone pot, its more the option to reposition the main lever switch so its down there and out of the way. It looks weird, but its great if your a bit of a "wild strummer" who always ends up in bridge pickup.
Volume + 6mm Mini Switch Hole
Nothing overly flash, and a pretty easy job from our point of view (so no extra cost involved) - the volume options under the "combination" header, are 10mm holes (for the pot) plus a 6mm hole for a mini switch. You can have this combo in either "the ‘IBZ’ layout", with the mini toggle hole between the IBZ Volume pot hole and the Standard Middle Tone hole.
A few gripes
I dont hate this ... but if you've ever tried fitting a mini switch to a pickguard, you pretty quickly see the problem. Mini Switches are pretty "tall" and they do, ultimately, take up a little bit of space - with the IBZ Combo, your losing alot of "hand room" between knobs, and with the Standard Volume Combo, your putting a fairly big obstacle between you and your lever switch.
A better way! the "Mini Slot"
As with many things, we've got David Gilmour to thank for this (i think!) - he (or his tech... or Fender) devised a clever little bracket that allowed a mini switch to be "sunk" so only the tip was visible above the pickguard. This, and this alone, pretty much saves the idea of the mini switch in the Standard volume position, the switch is in a sensible place, but its so small that it cant get in the way.
How It works
The Bracket mounts "over" the volume and tone pots, and then "dog legs" down, to where the switch mounts.This means the switches mounts are hidden, and the majority of the "lever arm" is under the pickguard, with only the tip visible.
Another angle
Just for completeness sake, the bracket from top down, which give a better idea of where the switch itself sits in relation to the UFO knobs when fitted to the plate.
"No Switch"
Without wanting to state the obvious, No switch means No switch in the usual position - I wouldn't suggest it unless you dont need a switch (1 pickup setups) or, your've specced up a different way to switch between pickups.
Toggle Switch
I'm not a massive fan pesonally, because, frankly, they're quite limited for the most part - only being useful for 2 pickup setups. There do exist, some clever "mutli-direction" toggles, such as the NSF Freeway switch, which give more options, but, I cant say i'm massively fond of them. They're fiddly to use day to day, and a pain to wire. Still, nothing inherently wrong with a toggle switch on a Stratocaster i suppose.
CHARV Angle Lever This one's a little bit "no ones asked for it.... but we can!" - rather than the standard Lever switch angle, you can have it at the same angle as a Charvel So-Cal (post 2016 version!) - its a little flatter then normal, and a little harder to accidentally knock back into bridge position.
Standard Angle Lever This "the norm" when it comes to a Stratocaster Switch. As mentioned in the main write up, the counter sinks are tied to historic accuracy, so, pre 83 plates, have counter sunk holes, and modern plates have "non counter sunk".
And finally: once drilled — whether to a standard hole plan or something a little more wild and wonderful — pickguards fall under our Custom work policy.
As always, if you’ve got any questions whatsoever, please feel free to get in touch and we’ll happily talk through the finer details of your proposed build
Colours
Ok, even I’ll concede this isn’t the most thrilling topic at this stage — but there’s a surprising amount of confusion around the various “off-white” pickguard colours. And seeing as we’re already ticking off pearls and tortoise shell variants, we might as well tackle the parchments, mints and creams too.
So, let’s get stuck in.
White
All our white plates use this exact shade — a fully opaque pigment with no translucency or ageing tint. It’s exactly what most people picture when they think “white pickguard”: clean, crisp, and pristine.
It doesn’t try to mimic vintage plastics or look “aged in,” so if you’re after a bright factory-fresh look — or you’re pairing it with bold or modern colours — this is the one.
Parchment
Sometimes sold as “aged white,” parchment sits one step in from pure white. It’s a touch darker, with a hint of cream or yellow in the mix — think along the lines of old newspaper or paper that’s had a few decades to mellow.
It’s a great middle ground if you don’t want the starkness of bright white, but you’re not ready to dive into full-on cream or mint territory.
Mint A
The lighter of the two mint shades. It’s not actually all that common on production guitars, which surprises a lot of people, because this is the tone most folks picture when they think “mint green.” It’s subtle, soft, and only just tinted — enough to take the edge off white without straying into cream.
Mint B
The “proper” mint green. Darker than Mint A, with a subtle grey undertone that gives it depth. Be warned — it does not photograph well and will often be corrected by cameras into something lighter or more vibrant than it actually is. In real life, it’s a rich, deep green, much closer to the discoloured nitrate plastics of the 1960s, which this colour originally sought to replicate.
Ivory
Ivory — sometimes called “Creme,” particularly in Gibson parlance — is a warm, buttery shade with a hint of orange. It’s not commonly seen on Fender-style pickguards, which makes it a bit special, but personally, I absolutely love the richness it brings to a build.
Black
Black is, well… black. There’s not a huge amount to say about it — it’s opaque, crisp, and very classy. I particularly like the contrast it creates on 3-ply pickguards with a white middle layer; it just works.
Mint Green Notes
Before we dive any deeper into colours, a few things are worth flagging about Mint Green — it’s a tricky shade and often comes across completely differently in photos.
First, if you’ve looked at the “real” photos of Mint A and Mint B, you’ve probably noticed they look almost identical. That’s not a mistake — cameras genuinely struggle to capture the subtle differences. They tend to auto-correct everything toward a washed-out Mint A, regardless of the actual plate.
So, why bother showing photos at all? Well, the unedited images highlight how misleading camera shots can be. From here, you have to trust the edited examples above, or the colour swatch in the pickguard customiser — that’s a very accurate representation of what the plates look like in real life.
The takeaway? Don’t rely on photos when judging Mint Green. If I’ve had this problem, so has everyone else. A quick search online will show you at least ten subtly different mint shades on Fender guitars — but in reality, Fender almost always used Mint B (with the exception of Fender Japan). Over the last 20 years, I’ve come across just four actual Mint Green shades: B, A, a very bright “snot” green, and a slightly lighter version of B that’s still pretty close.
Mint B
Unedited, Mint B looks nothing like this in real life. It’s a much darker green, with an almost greyish tint that gives it that classic, slightly aged 60s vibe.
Mint A
Mint A is actually quite close to this, though in real life it’s a bit more vibrant and not quite as “washed out” as the photo suggests.
Comparison
When Mint A and Mint B are photographed side by side, alongside a few other colours (in this case, White and Parchment), it provides a much clearer sense of the differences between the shades.
Ivory vs. Ivory/Black/Ivory
We actually carry two different Ivory plates. There is Ivory , available in a 3-ply Ivory/Ivory/Ivory version and a single-ply version, and we also have Ivory/Black/Ivory 3-ply, which is now obsolete but survives in old stock.
These are not the same colour. The Ivory/Black/Ivory plates will not match Ivory single-ply or Ivory/Ivory/Ivory plates. The I/B/I plates are closer to a nicotine yellow, whereas the I/I/I plates are much more of an orange “cream.”
Pearloids Explained
Pearloid pickguards are often lumped in with tortoiseshells, but they occupy their own, slightly shinier niche. They’re not as subtle as tortoiseshells — the swirls and patterns are more pronounced, with a pearlescent effect that catches the light beautifully. Historically, they’ve been a relatively straightforward affair: virtually all pearloid pickguards are made from PVC, and there isn’t a deep, mysterious backstory like some of the vintage materials.
What makes them interesting is less about origin and more about aesthetics. The colour and pattern variations are deliberate but consistent, making it fairly easy to anticipate how they’ll look on a finished guitar. Unlike tortoiseshell, which can shift dramatically from manufacturer to manufacturer, pearloid maintains a stable palette. That said, the swirl direction, density, and shine can give each plate a little personality — no two are ever perfectly identical.
In short, if you’re after a classic, eye-catching pickguard with a bit of sparkle, pearloid is a solid, no-fuss choice that’s stood the test of time.
White Pearl
White Pearl is the most common pearloid you’ll encounter, and its look is instantly recognisable: subtle, shimmering, and classic. Fun fact — pearloid was originally designed as a faux “mother of pearl,” meant to mimic the iridescent inner layer of oyster shells. The result is a clean, elegant pickguard that catches the light in a way that flat colours just can’t match.
Aged White Pearl
Aged White Pearl is actually more common than you might expect. Think of it as the pearloid equivalent of Parchment — slightly warmer, with a subtle creamy tint. The “pearling” is a bit tighter than standard White Pearl, with fewer blank spots between the reflective areas, giving it a more consistent, refined shimmer.
Grey Pearl
Grey Pearl isn’t my personal favourite. It started appearing a few years ago and was often misrepresented as “Black Pearl” in photos and marketing, but in reality, it’s nowhere near that dark. The grey tone gives a muted, subtle look, but it lacks the contrast and depth that makes other pearloids so appealing.
Avalon
Avalon is a relatively new pearloid pattern, and it gets much closer to the “mother of pearl” aesthetic that the original pearloids were trying to emulate. Instead of being broken into small reflective squares, the pattern flows with swirls and blotches, giving it a crisp, natural finish that really catches the light.
Abalone
If Avalon leans toward a mother-of-pearl look, Abalone is its more exotic counterpart, inspired by the iridescent inside of certain marine snail shells. The pattern is strikingly unique, favoring flowing swirls over the blocky reflective squares, giving it a vivid, eye-catching appearance.
Black Pearl
Black Pearl is always a bit contentious—it's not truly black, more of a dark grey. There is a slightly deeper version known as "Moto Pearl" (though tracking it down is another story), but both shades have their uses depending on the aesthetic you’re after.
Pearloid Quirks
Pearloid plates do have a few quirks of their own. While the material is relatively consistent, the way the “pearl” swirls are distributed can vary a lot from sheet to sheet. You might find sections with tight, dense pearling or areas that are more open and sparse. This isn’t a defect—just the nature of how the pattern is formed.
Additionally, colors can shift slightly depending on lighting and viewing angle, so a plate that looks crisp under one light may appear softer or more muted under another. It’s worth keeping this in mind when matching to existing finishes or other pickguards.
Shade Differences
When viewed on their own, pearloid plates can be tricky to compare, as the swirling patterns and reflections tend to dominate the eye. This is why side-by-side comparisons are so useful.
A good example shows Black Pearl and Grey Pearl next to each other, alongside Aged White Pearl and standard White Pearl. In this arrangement, the subtle differences in base color, contrast, and reflectivity become much clearer, helping you make a more informed choice.
Knobs
Pearloid pickguards present a unique challenge when it comes to matching knobs, tips, and covers, simply because the base color isn’t uniform. Here’s a practical approach:
Aged White Pearl pairs best with Parchment-colored plastics.
White Pearl and Avalon work well with standard White plastics.
Black Pearl doesn’t match true black knobs perfectly. In fact, it highlights the fact that Black Pearl isn’t genuinely black—but it’s about as close as you’re going to get.
3 and 4 Ply
Pearloid pickguards can be a bit confusing when it comes to ply count, because they don’t always follow the standard dark/light/dark pattern we’ve come to expect.
Essentially, the pearloid layer on the front of the plate counts as a ply. This means:
3-ply pearloid plates can appear as just 2 plys, especially on lighter pearls where the pearloid layer is semi-transparent and looks white.
4-ply pearloid plates often appear as 3 plys.
In this photo, you can just make out the individual plys and how they layer together.
Tortoise Shells
You’ve probably noticed that we do a huge variety of tortoise shell pickguards – and even then, we barely scratch the surface of the available styles.
Originally, tortoise shell pickguards were made from actual tortoise shell – pieces carefully shaped, joined, and polished until semi-transparent. Some of the earliest acoustic pickguards were made this way. Of course, nobody wants to go back to that practice, but people loved the look. When plastics came along in the early 20th century, they offered a much cheaper and more practical alternative. (Trade in hawksbill turtle shells didn’t become illegal until the 1970s.)
The first plastic tortoise shells were made from celluloid . It’s semi-transparent, with a kind of leopard-skin effect, and it looked gorgeous. Celluloid made its way onto guitars, mostly acoustics, and eventually electrics by the late ’50s and early ’60s. The problem? Celluloid is extremely flammable. Cutting it generates heat, storage is risky, and it’s generally unstable – prone to warping, shrinking, and colour changes under sunlight.
Today, tortoise shells are mostly made from Polyoxymethylene (more stable, but still flammable) or PVC (extremely durable, though it gives off toxic fumes if burned).
For modern pickguards, we typically work with five main variants (ignoring the rare, historical celluloid options). While celluloid still exists and looks incredible for historical accuracy, it’s extremely expensive, difficult to source, and high risk to work with. As a rough guide, sourcing a single celluloid plate could cost upwards of £150.
Classic
This is a funny one. For the longest time, it was the only tortoise shell we had access to, and honestly – it’s fine. You see it fairly often on mid-priced guitars like the Squier® Classic Vibe and Vintage Modified lines.
Personally, I think of it as a “cheat” tortoise shell, because it appears to be a screen print sandwiched between layers of PVC. That gives it a slightly flat look, but it’s very uniform. So, if consistency is your goal and you want all your tortoise shells to look the same, Classic is the way to go.
3 Ply Brown
Now we’re talking. Unlike the “flat layer” version, 3 Ply Brown is the real deal – multiple semi-transparent PVC layers (usually one yellow, one brown) overlaid to create that classic tortoise shell effect.
For whatever reason, the 3-ply version tends to show a little more yellow in the mix than the 4-ply, giving it extra depth and richness. If pressed, I’d say it’s my favourite of the tortoise shells.
4 Ply Brown
Slightly darker than the 3-ply version, the 4-ply shows less yellow bleed-through in the mix—presumably because the yellow layer is thinner. The overall effect is a richer, more subdued tortoise shell look, while still retaining that classic depth.
3 Ply Red
Much like the 3-ply brown, this version layers yellow and red PVC, one on top of the other. The principle is the same, but the result is a more vibrant, warmer tortoise shell, giving a slightly livelier appearance on the pickguard.
4 Ply Red
In the 4-ply red, the yellow layer is largely removed, leaving a deep, rich red that almost approaches a red pearloid. It’s clean, vibrant, and avoids the subtle yellow tinge you see in the 3-ply version — perfect if you want a striking, uniform red tortoise effect.
Celluloid
For completeness, here’s a look at a celluloid plate. It’s absolutely gorgeous, with incredible depth to the “shell” effect that PVC can’t quite replicate. That said, if you look closely, you’ll notice this Jazzmaster plate has warped significantly. It’s been stored under the same conditions as the PVC plates, but celluloid simply doesn’t age as well — beautiful, but far less stable.
A Quick Note on Returns for These Plates
These plates are made to order, based entirely on the specifications you choose—pot hole positioning, pickup routing, and any other tweaks. Because of this, they’re classed as custom work and fall under the relevant section of our Terms & Conditions.
Once we’ve made a plate to your chosen spec, it becomes non-returnable and non-refundable . Even if the product page shows a “standard” configuration, that’s just a starting point—every plate is individually built to your selections.
Before hitting “buy,” please double-check that everything is exactly how you want it. We’ve made it as easy as possible to be confident in your order:
We want you to feel confident in your order—and we’re here to help if you have any questions.
Once it’s made, it’s yours: no returns, no refunds.
FAQs
Will this pickguard fit <INSERT GUITAR MODEL HERE>?
Alright, I’ve typed this out in emails tens of thousands of times, and honestly? The answer is still the same:
“I DON’T KNOW.”
No one really does—not with total, unwavering certainty. And here’s why:
1. The sheer variety of guitars
I (and any guitar tech, shop employee, or parts specialist) see a tiny cross-section of guitars each year. There are models I’ve never seen in the flesh, let alone held in my hands for a pickguard swap. Some makes and models won’t even come onto my radar until an email or call mentions them.
There’s no “Haynes manual” for pickguards. Even Fender® doesn’t publish a spec sheet for every Strat®, Tele®, or Les Paul®. Knowledge here is largely a hive mind thing—shared between techs, enthusiasts, and shop staff. I generally only know if a pickguard fits when someone tells me it worked (or didn’t). Feedback is everything.
2. Pickguards aren’t truly standardized
It’s a common assumption, but not entirely true. There are recognized specs—take Stratocasters®, for example: 1954–57, 1958–62, and 1963 onward. Mounting screw positions remain consistent in those ranges.
But even within those ranges, guitars can be slightly “off.” A hole might move 2 mm, a tremolo cavity might be 1 mm smaller, or a humbucker route could shift 5–6 mm. Sometimes these changes are factory experiments, sometimes they’re just quirks. By the next production run, everything might snap back to the standard.
So yes—a pickguard that fits one guitar of the same model may not fit another produced a week later.
What’s the best advice for checking fit?
Measure it yourself. Technical Specification tab for diagrams. Measure centre-to-centre on holes, edge-to-edge on the shortest sides, and allow a small tolerance for measurement error. It’s a two-minute job.
What if it fits physically, but screw holes don’t line up?
Options:
Option 1 – Modify your guitar:
Option 2 – Custom pickguards:
“I’ve received my pickguard and it’s VERY scratched.”
Chances are, what you’re seeing isn’t actually scratches on the pickguard itself—it’s the protective plastic film applied to the surface during manufacturing and shipping.
This thin sheet is designed to shield your pickguard from scuffs, scratches, and dust while it’s being made, packed, and shipped. It’s completely normal for this film to look a bit worn or scratched—the good news is, that means the pickguard underneath is still pristine.
What to do: Carefully peel off the protective film before installing your pickguard. You’ll reveal the flawless, shiny surface underneath.
If you do spot any marks after removing the film, please get in touch—we want to make sure every pickguard leaves here looking perfect.
General Specifications Pickup Route - SC/SC/SC
Material/Composition - >85% PVC,<10% methyl methacrylate , <3% Organotin , <1% Bis (2-ethylhexyl), < 1% Pigment (Excluding Bakelite plates)
Mounting Screw Config - 11 Hole Counter Sunk
Pickup & Switch Bolts - Dome Head
1 Ply plates have a 90 degree edge, 3 ply plates have a 45 degree beveled edge (excluding the Bridge and Neck routes, and any internal routing)
Weight - 100g
Sealed with a protective sheet.
SCHB Wiring Loom
This is an SCHB wiring loom, built specifically to match the control layout you've designed under the "Customise Controls" section.
Rather than following a fixed factory specification, the loom is built around your chosen control layout. For example, if you've specified two controls instead of the traditional three, the loom will be wired as a Master Volume and Master Tone , regardless of where those controls are physically positioned on the pickguard. If you've chosen a single control, the loom will be wired as a Master Volume only.
There are two important things to bear in mind with this wiring loom.
Firstly, it doesn't matter where the two pickups are positioned on the pickguard—only that there is one single coil and one humbucker (or P90-style pickup) . Whether you've designed a Bridge & Neck layout, Bridge & Middle, or Middle & Neck, the loom is built to suit.
Secondly, the loom isn't concerned with the exact pickup models you've chosen. A Telecaster® bridge pickup with a Mini Humbucker® neck? No problem. A Stratocaster® middle pickup with a Covered Humbucker® neck? Equally at home. As long as the pickup combination follows the SCHB format, the loom will work.
Because this is a mixed pickup configuration, there are a few additional technical considerations.
The loom is built around 500k CTS potentiometers , which are ideal for humbuckers and P90-style pickups. To ensure the single coil still "sees" a load much closer to the traditional 250k value, a resistor is switched into the circuit whenever the single coil is selected. This gives both pickup types a much more appropriate load without compromising either.
When using the middle switch position, the humbucker must be coil-split, exactly as shown in the wiring diagram. If you're using a traditional 2-conductor humbucker , the loom will still function, but you'll need to install a small jumper between the two humbucker live terminals on the switch and ignore the red and white coil-split connections.
In this configuration, both humbucker coils remain active alongside the single coil, resulting in three coils operating together. This can produce significant phase cancellation and a noticeably thinner sound. For the best results, we strongly recommend using a 4-conductor humbucker , allowing the humbucker to split correctly in the middle position.
It's also worth ensuring that the south (screw) coil of the humbucker—the coil that remains active when split—is opposite in magnetic polarity and electrical phase to the single coil. This provides the traditional hum-cancelling "in-between" sound that many players are looking for.
There are a few details that are open to interpretation, such as the tone capacitor and, occasionally, potentiometer values. If your chosen specification suggests a more appropriate combination, we'll contact you before building your loom to discuss the options. As standard, however, this loom is built using 500k CTS Audio Taper potentiometers and a 0.022µF Cornell Dubilier tone capacitor .
Your loom will also be wired to match the switch you've selected under the "Wiring" section.
3-Way Switching
Pickup #1 (typically the Bridge pickup)
Pickup #1 + Pickup #2 (wired in parallel, with the humbucker coil-split)
Pickup #2 (typically the Neck pickup)
Where two tone controls are present, the loom is wired using the traditional Stratocaster® arrangement:
This isn't set in stone, and we're more than happy to accommodate alternative tone assignments if you have a particular preference. We've intentionally kept these options out of the customiser to avoid making the ordering process unnecessarily complicated, but if you'd like something different, simply let us know when placing your order.
Please note: This wiring loom does not include pickups. You'll need to connect your own pickups following the wiring diagram below.
As this is a traditional soldered (point-to-point) wiring loom , you'll need to solder:
Your pickup connections to the circuit. The output jack (mono socket). The bridge/tremolo claw ground wire.
If you'd prefer to avoid soldering, our solderless wiring looms allow all of these connections to be made using screw terminals instead.
This is a
solderless wiring loom, so there's no soldering required .
Your pickups connect directly to clearly labelled screw terminals, making installation quick, straightforward, and completely reversible if you ever decide to change pickups in the future.
The output jack (mono socket) is already pre-wired, and the bridge ground is supplied on a replacement tremolo claw. Both are fitted to screw terminals and can be easily disconnected while feeding the wiring through the guitar's routing, then reconnected once everything is in place.
As with all of our wiring looms,
pickups are not supplied and must be connected during installation.
HBSC Wiring Loom
This is an HBSC wiring loom, built specifically to match the control layout you've designed under the "Customise Controls" section.
Rather than following a fixed factory specification, the loom is built around your chosen control layout. For example, if you've specified two controls instead of the traditional three, the loom will be wired as a Master Volume and Master Tone , regardless of where those controls are physically positioned on the pickguard. If you've chosen a single control, the loom will be wired as a Master Volume only.
There are two important things to bear in mind with this wiring loom.
Firstly, it doesn't matter where the two pickups are positioned on the pickguard—only that there is one humbucker (or P90-style pickup) and one single coil . Whether you've designed a Bridge & Neck layout, Bridge & Middle, or Middle & Neck, the loom is built to suit.
Secondly, the loom isn't concerned with the exact pickup models you've chosen. A Mini Humbucker® bridge with a Telecaster® middle pickup? No problem. A full-size Covered Humbucker® bridge with a Stratocaster® neck pickup? Equally at home. As long as the pickup combination follows the HBSC format, the loom will work.
Because this is a mixed pickup configuration, there are a few additional technical considerations.
The loom is built around 500k CTS potentiometers , which are ideal for humbuckers and P90-style pickups. To ensure the single coil still "sees" a load much closer to the traditional 250k value, a resistor is switched into the circuit whenever the single coil is selected. This gives both pickup types a much more appropriate load without compromising either.
When using the middle switch position, the humbucker must be coil-split, exactly as shown in the wiring diagram. If you're using a traditional 2-conductor humbucker , the loom will still function, but you'll need to install a small jumper between the two humbucker live terminals on the switch and ignore the red and white coil-split connections.
In this configuration, both humbucker coils remain active alongside the single coil, resulting in three coils operating together. This can produce significant phase cancellation and a noticeably thinner sound. For the best results, we strongly recommend using a 4-conductor humbucker , allowing the humbucker to split correctly in the middle position.
It's also worth ensuring that the south (screw) coil of the humbucker—the coil that remains active when split—is opposite in magnetic polarity and electrical phase to the single coil. This provides the traditional hum-cancelling "in-between" sound that many players are looking for.
There are a few details that are open to interpretation, such as the tone capacitor and, occasionally, potentiometer values. If your chosen specification suggests a more appropriate combination, we'll contact you before building your loom to discuss the options. As standard, however, this loom is built using 500k CTS Audio Taper potentiometers and a 0.022µF Cornell Dubilier tone capacitor .
Your loom will also be wired to match the switch you've selected under the "Wiring" section.
3-Way Switching
Pickup #1 (typically the Bridge pickup)
Pickup #1 + Pickup #2 (wired in parallel, with the humbucker coil-split)
Pickup #2 (typically the Neck pickup)
Where two tone controls are present, the loom is wired using the traditional Stratocaster® arrangement:
This isn't set in stone, and we're more than happy to accommodate alternative tone assignments if you have a particular preference. We've intentionally kept these options out of the customiser to avoid making the ordering process unnecessarily complicated, but if you'd like something different, simply let us know when placing your order.
Please note: This wiring loom does not include pickups. You'll need to connect your own pickups following the wiring diagram below.
As this is a traditional soldered (point-to-point) wiring loom , you'll need to solder:
Your pickup connections to the circuit. The output jack (mono socket). The bridge/tremolo claw ground wire.
If you'd prefer to avoid soldering, our solderless wiring looms allow all of these connections to be made using screw terminals instead.
This is a
solderless wiring loom, so there's no soldering required .
Your pickups connect directly to clearly labelled screw terminals, making installation quick, straightforward, and completely reversible if you ever decide to change pickups in the future.
The output jack (mono socket) is already pre-wired, and the bridge ground is supplied on a replacement tremolo claw. Both are fitted to screw terminals and can be easily disconnected while feeding the wiring through the guitar's routing, then reconnected once everything is in place.
As with all of our wiring looms,
pickups are not supplied and must be connected during installation.
SCSC Wiring Loom
This is a
Two Single Coil (SCSC) wiring loom, built specifically to match the control layout you've designed under the "Customise Controls" section.
Rather than following a fixed factory specification, the loom is built around your chosen control layout. For example, if you've specified two controls instead of the traditional three, the loom will be wired as a
Master Volume and Master Tone , regardless of where those controls are physically positioned on the pickguard. If you've chosen a single control, the loom will be wired as a Master Volume only.
There are two important things to bear in mind with this wiring loom.
Firstly, it doesn't matter where the two pickups are positioned on the pickguard—only that there are
two single coil pickups . Whether you've designed a Bridge & Neck layout, Bridge & Middle, or Middle & Neck, the wiring loom will work perfectly.
Secondly, the loom doesn't really care what type of single coil pickups you've chosen. Traditional Stratocaster® single coils, Telecaster® pickups, and other low-inductance single coil designs are all electrically very similar, and are perfectly suited to the
250k CTS potentiometers supplied with the loom.
There are a few details that are open to interpretation, such as the tone capacitor and, occasionally, potentiometer values. If your chosen pickup combination suggests a more appropriate specification, we'll contact you before building your loom to discuss the options. As standard, however, this loom is built using
250k CTS Audio Taper potentiometers and a 0.022µF Cornell Dubilier tone capacitor .
Your loom will also be wired to match the switch you've selected under the
"Wiring" section.
3-Way Switching
Pickup #1 (for example, the Bridge pickup)
Pickup #1 + Pickup #2 (wired in parallel)
Pickup #2 (for example, the Neck pickup)
Where two tone controls are present, the loom is wired using the traditional Stratocaster® arrangement:
This isn't set in stone, and we're more than happy to accommodate alternative tone assignments if you have a particular preference. We've intentionally kept these options out of the customiser to avoid making the ordering process unnecessarily complicated, but if you'd like something different, simply let us know when placing your order.
Please note: This wiring loom does not include pickups. You'll need to connect your own pickups following the wiring diagram below.
As this is a traditional soldered (point-to-point) wiring loom , you'll need to solder:
Your pickup connections to the circuit. The output jack (mono socket). The bridge/tremolo claw ground wire.
If you'd prefer to avoid soldering, our solderless wiring looms allow all of these connections to be made using screw terminals instead.
This is a
solderless wiring loom, so there's no soldering required .
Your pickups connect directly to clearly labelled screw terminals, making installation quick, straightforward, and completely reversible if you ever decide to change pickups in the future.
The output jack (mono socket) is already pre-wired, and the bridge ground is supplied on a replacement tremolo claw. Both are fitted to screw terminals and can be easily disconnected while feeding the wiring through the guitar's routing, then reconnected once everything is in place.
As with all of our wiring looms,
pickups are not supplied and must be connected during installation.
SCSCSC Wiring Loom
This is an
SCSCSC wiring loom , built specifically to match the control layout you've designed under the "Customise Controls" section.
The loom follows your chosen control layout rather than a fixed factory specification. For example, if you've chosen a two-control layout instead of the traditional three controls, the loom will be wired as a
Master Volume and Master Tone , regardless of where the controls are physically positioned on the pickguard. If you've chosen a single control, the loom will be wired as a Master Volume only.
250k "Vintage Audio Taper", Split shaft CTS pots , and a 0.0.022µF Cornell Dubilier capacitor, and a short thread Swiftcraft Mono Socket.
Your loom will also be wired to match the switch you've selected under the
"Wiring" section.
5-Way Switching
Bridge
Bridge + Middle (parallel)
Middle
Middle + Neck (parallel)
Neck
3-Way Switching
Bridge
Middle
Neck
Where two tone controls are present, the loom is wired to the traditional Stratocaster® arrangement:
This isn't set in stone, and we're happy to accommodate alternative tone assignments if you have a particular preference. We've intentionally kept these options out of the customiser to avoid making the ordering process unnecessarily complicated, but if you'd like something different, just let us know when placing your order.
Wiring Diagram
Please note: This wiring loom does not include pickups. You'll need to connect your own pickups following the wiring diagram below.
As this is a traditional soldered (point-to-point) wiring loom , you'll need to solder:
Your pickup connections to the circuit. The output jack (mono socket). The bridge/tremolo claw ground wire.
If you'd prefer to avoid soldering, our solderless wiring looms allow all of these connections to be made using screw terminals instead.
This is a
solderless wiring loom, so there's no soldering required .
Your pickups connect directly to clearly labelled screw terminals, making installation quick, straightforward, and completely reversible if you ever decide to change pickups in the future.
The output jack (mono socket) is already pre-wired, and the bridge ground is supplied on a replacement tremolo claw. Both are fitted to screw terminals and can be easily disconnected while feeding the wiring through the guitar's routing, then reconnected once everything is in place.
As with all of our wiring looms,
pickups are not supplied and must be connected during installation.
...
HBHB Wiring Loom
This is an
HBHB wiring loom , built specifically to match the control layout you've designed under the Customise Controls section.
Rather than following a fixed factory specification, every loom is built around the control layout you've created. For example, if you've chosen a two-control layout instead of the traditional three controls, your loom will be wired as
Master Volume / Master Tone , regardless of where those controls are physically positioned on the pickguard. If you've chosen a single control, the loom will be wired as a Master Volume only.
One important thing to remember is that this loom doesn't really care what type of pickups you've selected. Whether you've designed a traditional
HH® layout, a P90® bridge with a Mini Humbucker® neck , or something even more unusual, electrically they all require the same style of circuit and are generally best suited to 500k CTS potentiometers .
So, technically, this isn't strictly an "HH wiring loom" at all—it's really a wiring loom for
any two-pickup configuration that traditionally uses 500k controls . "HBHB" is simply a much easier way to describe it!
There are a few details that are open to interpretation, however. The tone capacitor—and occasionally the potentiometer values—are good examples. If your chosen pickup combination would benefit from something different, we'll contact you before building your loom to discuss the options. As standard, this loom is built using
500k CTS audio taper potentiometers and a 0.022µF Cornell Dubilier tone capacitor .
Your loom will also be wired to match the switch you've selected under the
Wiring section.
3-Way Switching
Bridge
Bridge + Neck (parallel)
Neck
Where two tone controls are present, the loom is wired using the traditional two-humbucker arrangement:
This isn't set in stone, and we're more than happy to accommodate alternative tone assignments if you have a particular preference. We've intentionally kept these options out of the configurator to keep the ordering process as straightforward as possible, but if you'd like something different, simply let us know when placing your order.
Wiring Diagram
Please note: This wiring loom does not include pickups. You'll need to connect your own pickups following the wiring diagram below.
As this is a traditional soldered (point-to-point) wiring loom , you'll need to solder:
Your pickup connections to the circuit. The output jack (mono socket). The bridge/tremolo claw ground wire.
If you'd prefer to avoid soldering, our solderless wiring looms allow all of these connections to be made using screw terminals instead.
This is a
solderless wiring loom, so there's no soldering required .
Your pickups connect directly to clearly labelled screw terminals, making installation quick, straightforward, and completely reversible if you ever decide to change pickups in the future.
The output jack (mono socket) is already pre-wired, and the bridge ground is supplied on a replacement tremolo claw. Both are fitted to screw terminals and can be easily disconnected while feeding the wiring through the guitar's routing, then reconnected once everything is in place.
As with all of our wiring looms,
pickups are not supplied and must be connected during installation.
Parts Specifications
Weight - 21g
Screw Thread - #6-32
Materials Frame and Arm - Steel
Board - Bakelite
Terminals - Brass
Pots
Knob Shaft - 5.9mm, knurled
Tolerance - +/- 10%
Supplied with 1 Mounting Nut, 1 Washer and 1 "Star" washer


 Squier SE Strat


 Fender Strat MIM